Connecting an AI Agent
Configure your AI agent to use the neonto MCP server. GitHub Copilot Chat in VS Code connects automatically. For other clients, use Set up Your AI Agent first. If it does not work, follow the manual setup steps for your agent. The guides use the default server port, 6789. See Troubleshooting if you configured a different port or the server does not start.
Set up Your AI agent
neonto: Set Up AI Agent is the one-step way to wire an agent to neonto.
- Open the Command Palette (
Ctrl+Shift+P/F1). - Run
neonto: Set Up AI Agent. - Pick your agent. neonto writes the files that agent reads into the root of your open workspace folder:
| Agent | MCP config file | Instruction file |
|---|---|---|
| GitHub Copilot | .vscode/mcp.json (VS Code servers schema) | AGENTS.md |
| OpenAI Codex | .codex/config.toml | AGENTS.md |
| Claude | .mcp.json (mcpServers schema) | CLAUDE.md |
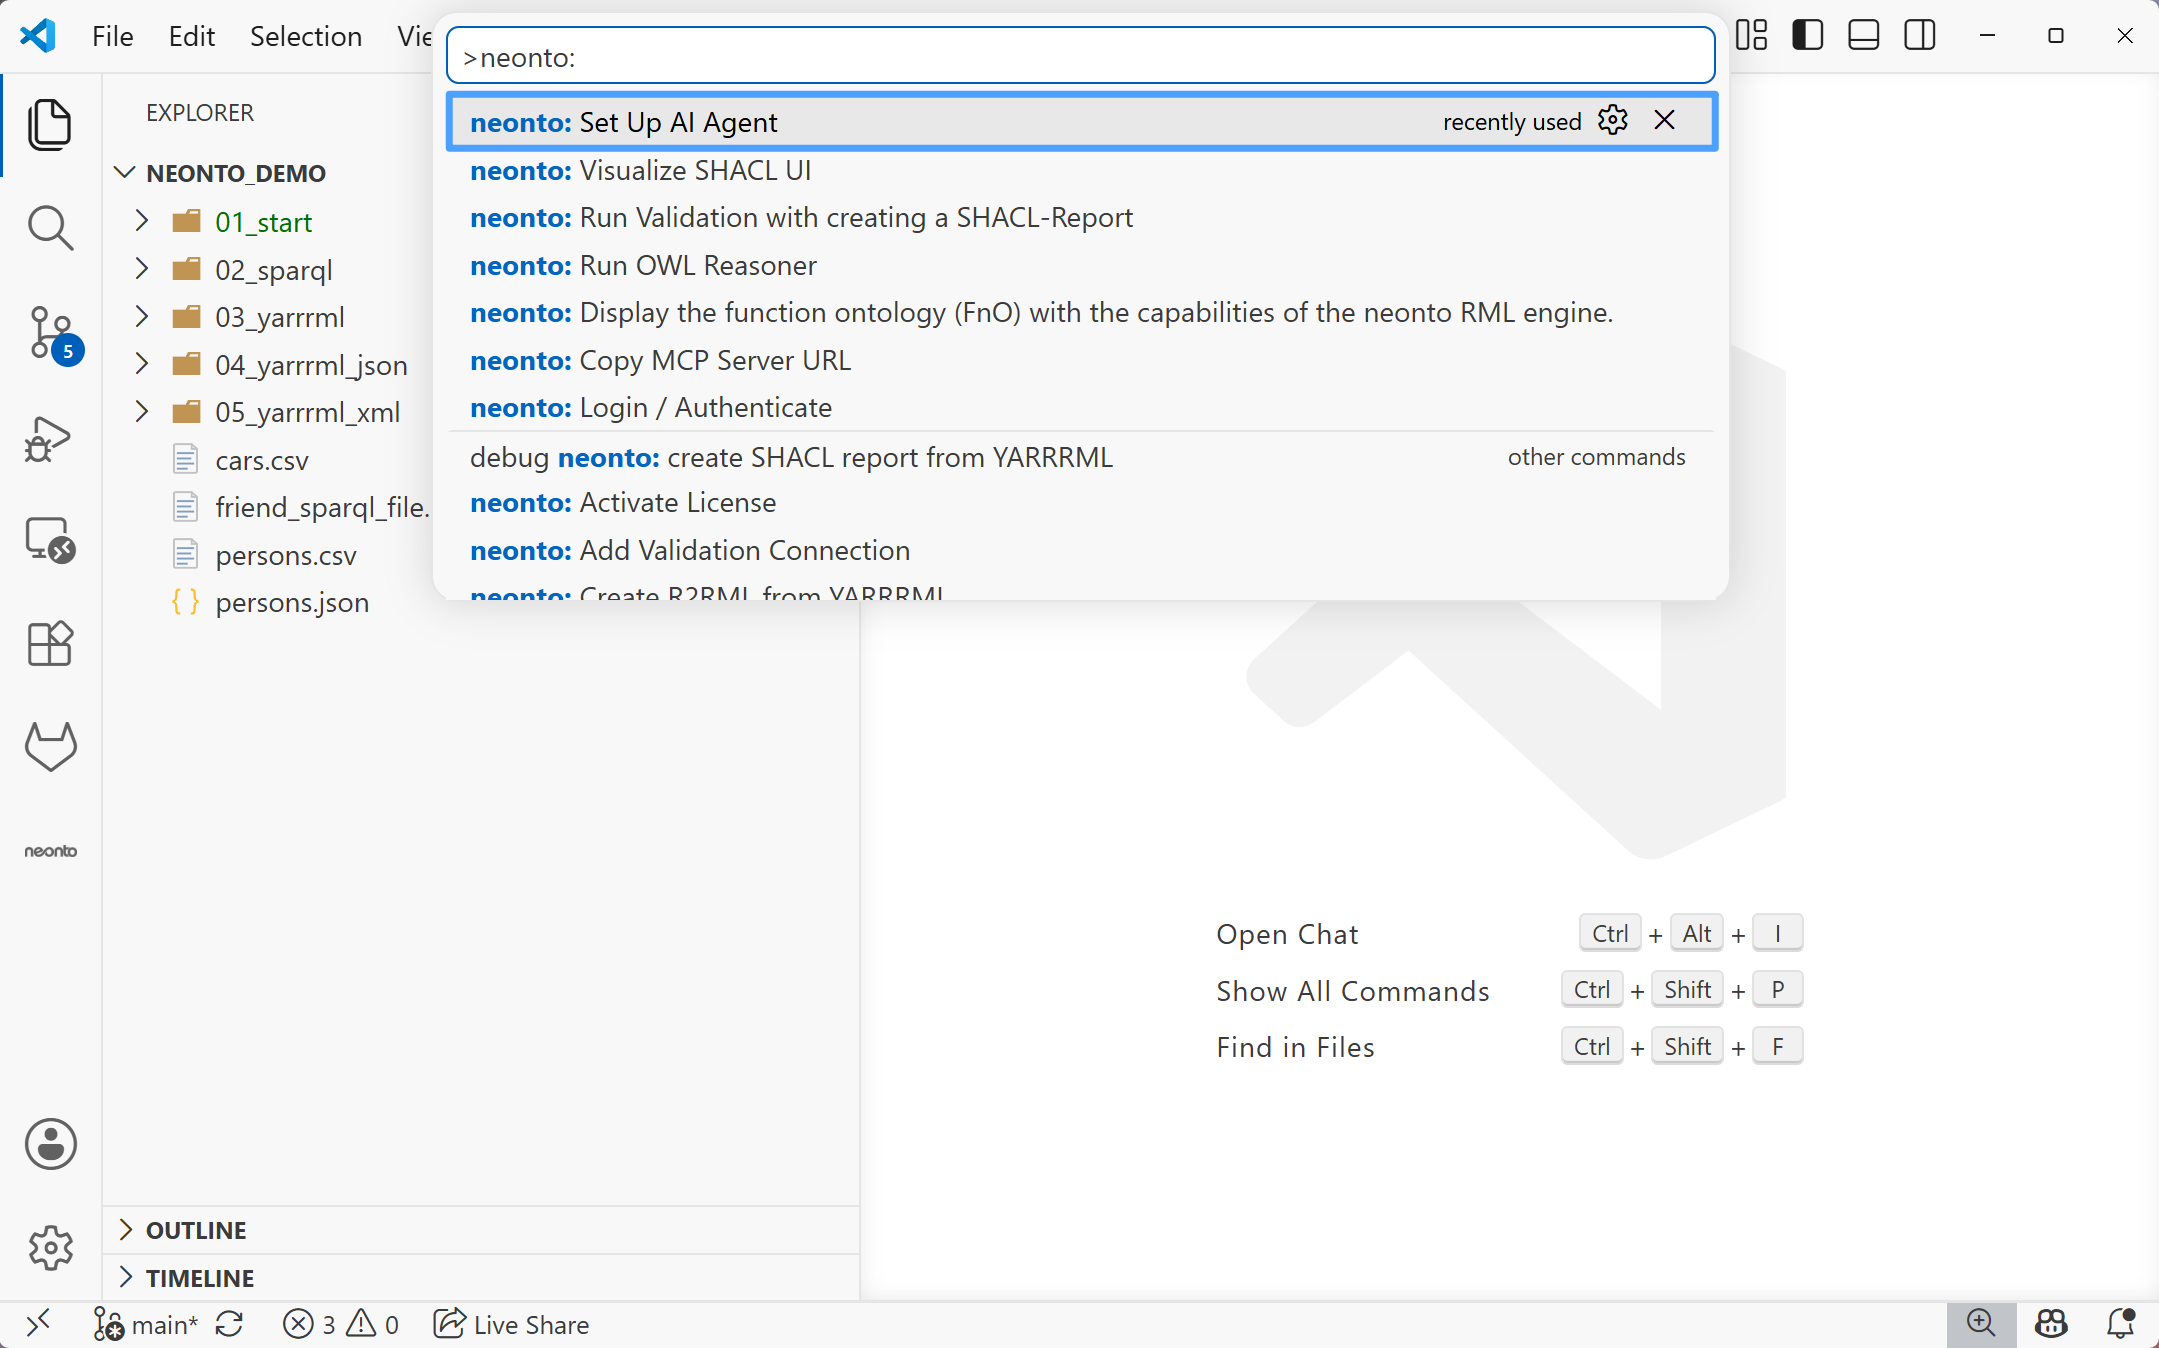
neonto: Set Up AI Agent command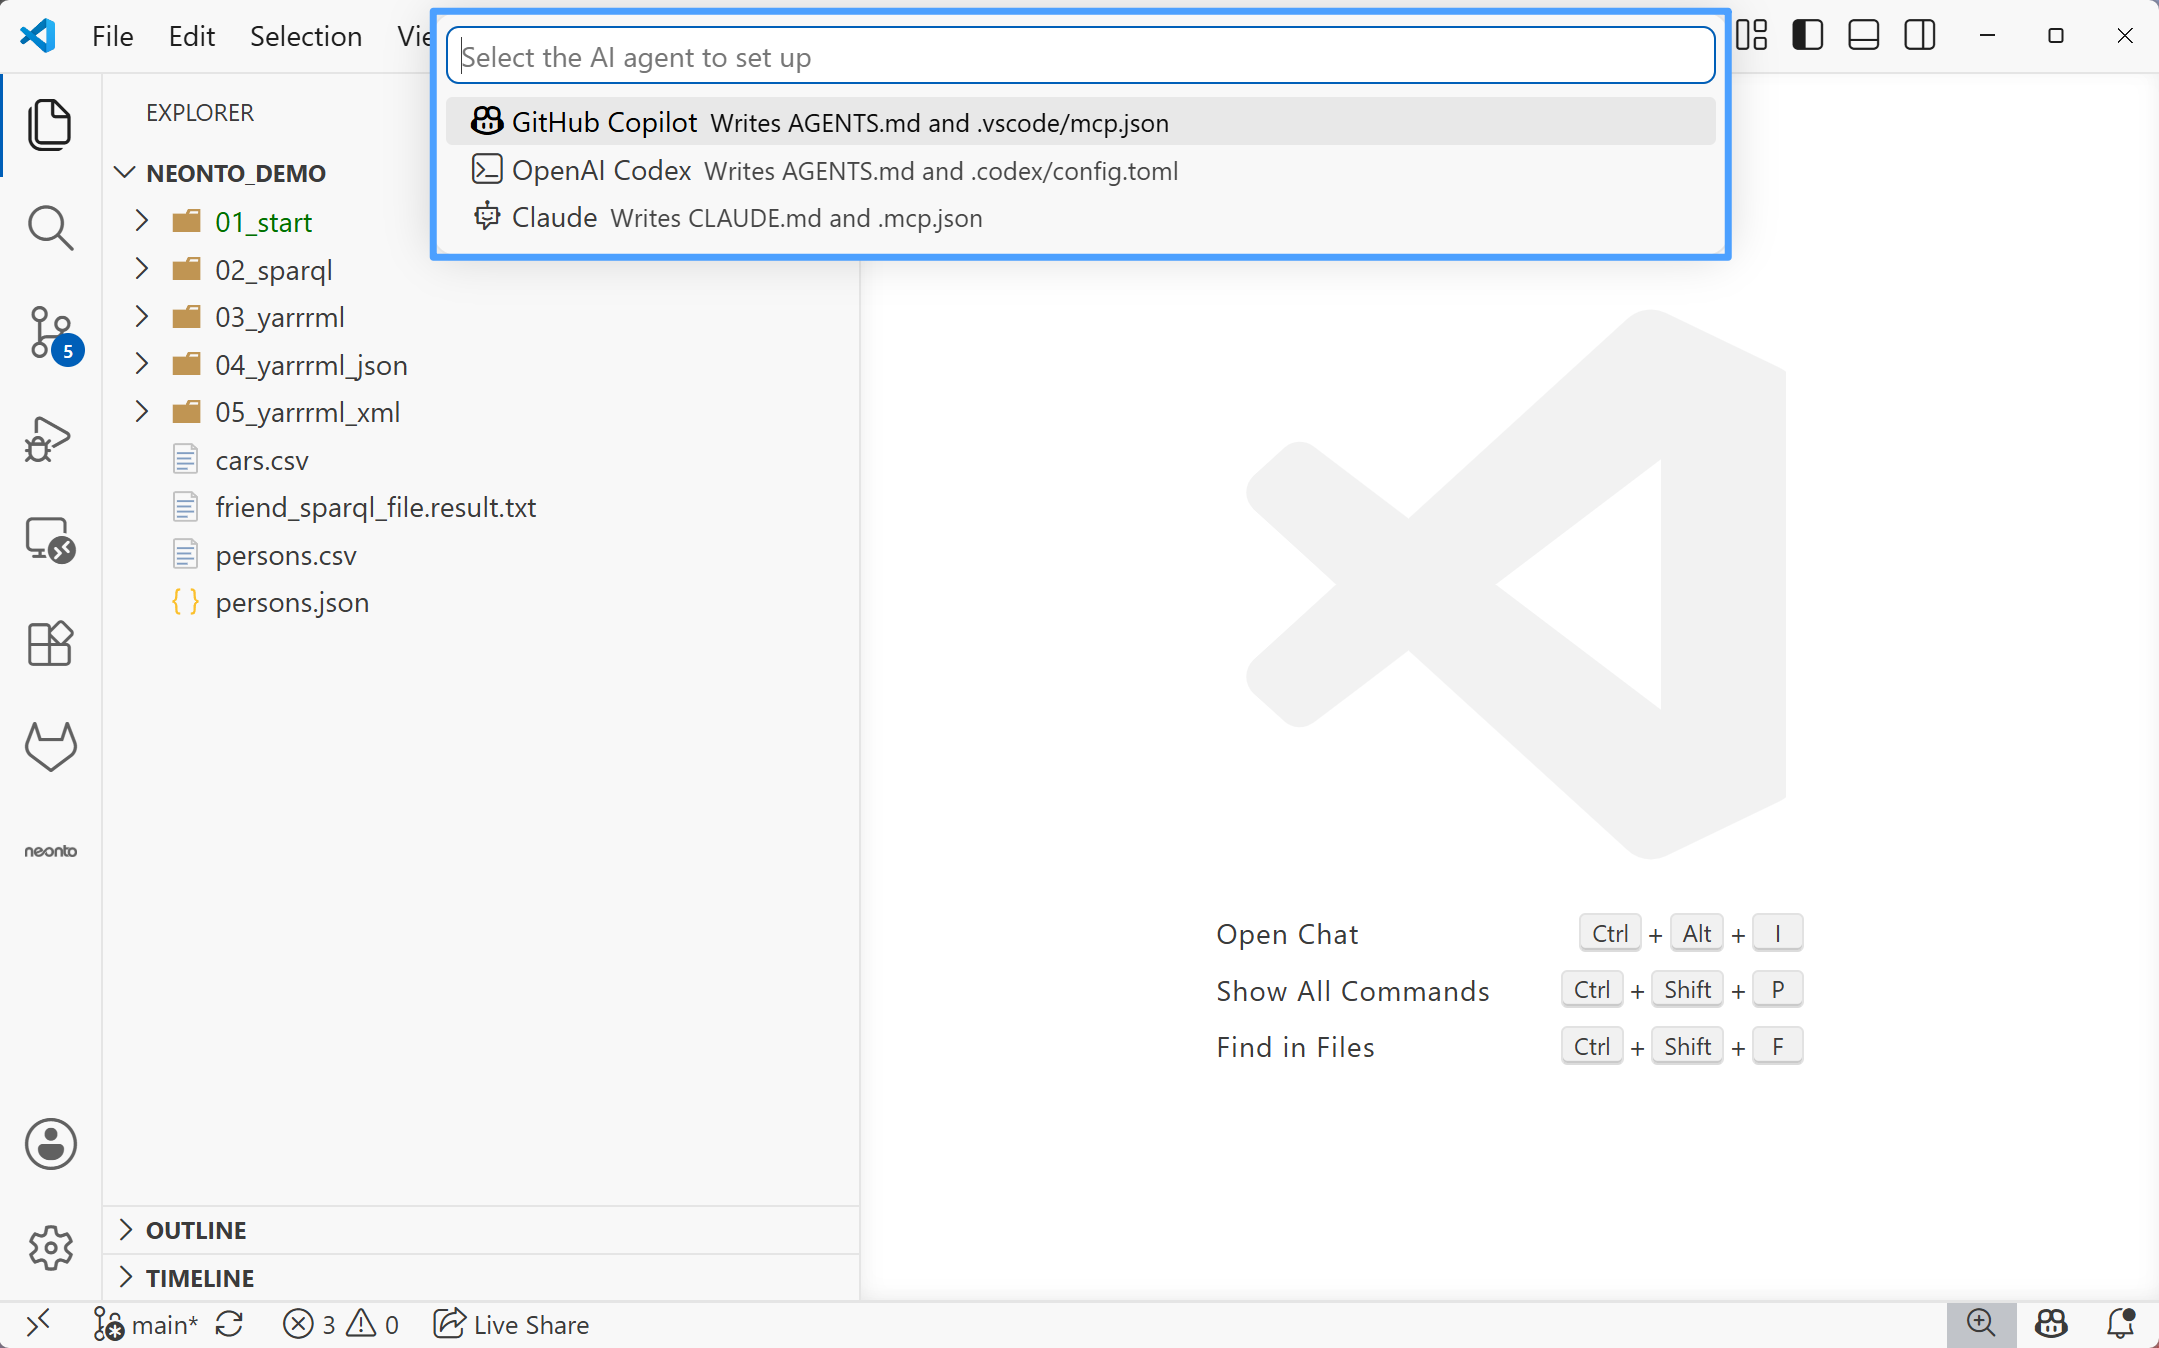
Claude, GitHub Copilot, and Codex CLI are all set up by the neonto: Set Up AI Agent command above and should be running by now. The Codex chat integration (VS Code extension) isn't covered by that command and requires manual steps, see Codex extension in VS Code.
The MCP config file is pre-filled with the server's current URL — no editing needed.
The instruction file (AGENTS.md or CLAUDE.md) tells the agent how to work with neonto:
- Read the matching syntax guide before writing a file
- Validate the result afterwards
- Resolve vocabulary terms instead of guessing them
neonto never clobbers your files:
- JSON configs (
.vscode/mcp.json,.mcp.json) are merged — your other MCP servers, comments, and formatting are preserved; only theneontoentry is added or updated. - The Codex
.codex/config.tomlis only created when absent. If you already have one, neonto leaves it untouched and offers the[mcp_servers.neonto]block to copy so you can add it yourself. - Instruction files are appended to, never overwritten: if
AGENTS.md/CLAUDE.mdalready exists, neonto adds its block only when it isn't already there.
The generated .mcp.json (Claude) looks like this:
{
    "mcpServers": {
        "neonto": {
            "type": "http",
            "url": "http://127.0.0.1:6789/mcp"
        }
    }
}
The generated .codex/config.toml (Codex CLI) looks like this:
[mcp_servers.neonto]
url = "http://127.0.0.1:6789/mcp"
Codex notes:
- Trust requirement: Codex only loads a project-scoped
.codex/config.tomlfor a trusted folder. Trust the workspace in Codex (CLI or extension), or the file is ignored.- Older versions: Streamable HTTP servers require the flag
experimental_use_rmcp_client = truein a[features]section.- Verification: Run
codex mcp listto verify the connection.
Verify the connection
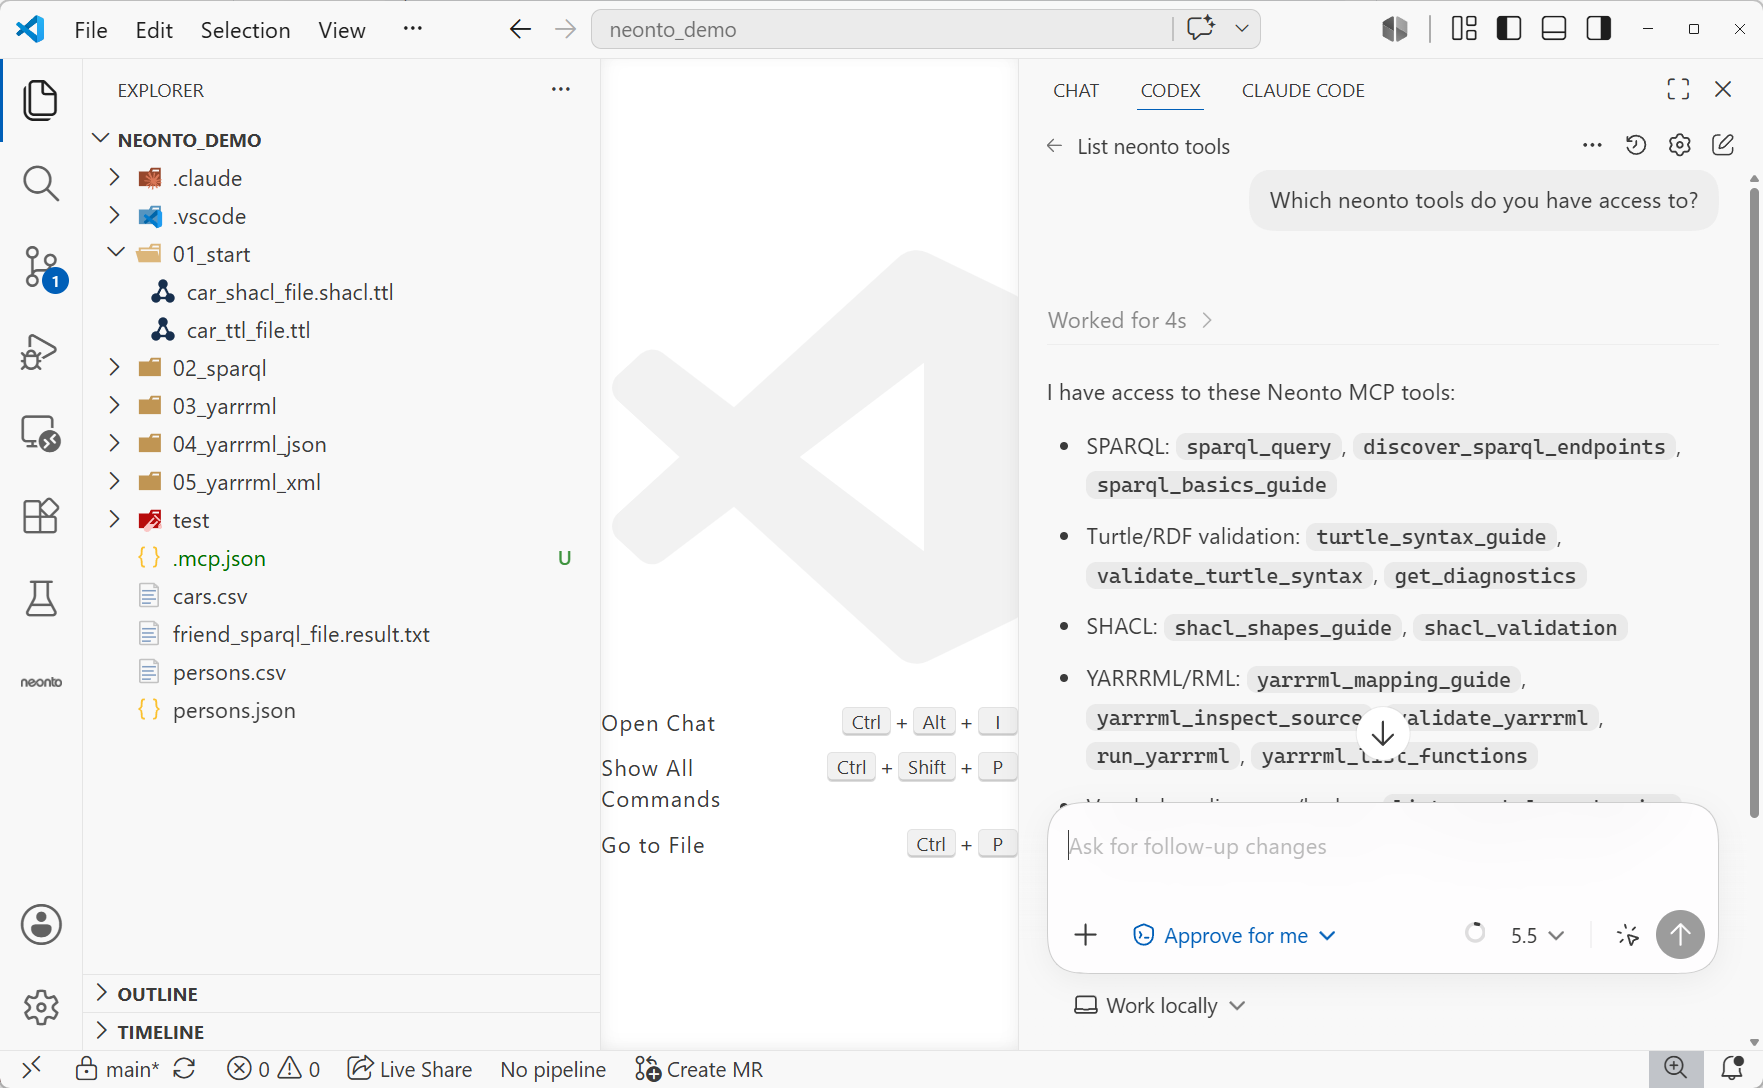
Once connected, ask your agent to list its available tools and confirm neonto's tools (for example sparql_query or turtle_syntax_guide) appear.
Manual Setup
Copy the server URL
- Open the Command Palette.
- Run
neonto: Copy MCP Server URL. - The endpoint URL (e.g.
http://127.0.0.1:6789/mcp) is copied to your clipboard and shown in a notification.
Discovering the URL without a command
The running server's URL is also made available VS Code internally, so tooling like the GitHub Copilot Chat can discover it without you running a command. The same URL is also shown in the "neonto MCP server started" notification when the extension activates.
GitHub Copilot
GitHub Copilot Chat in VS Code
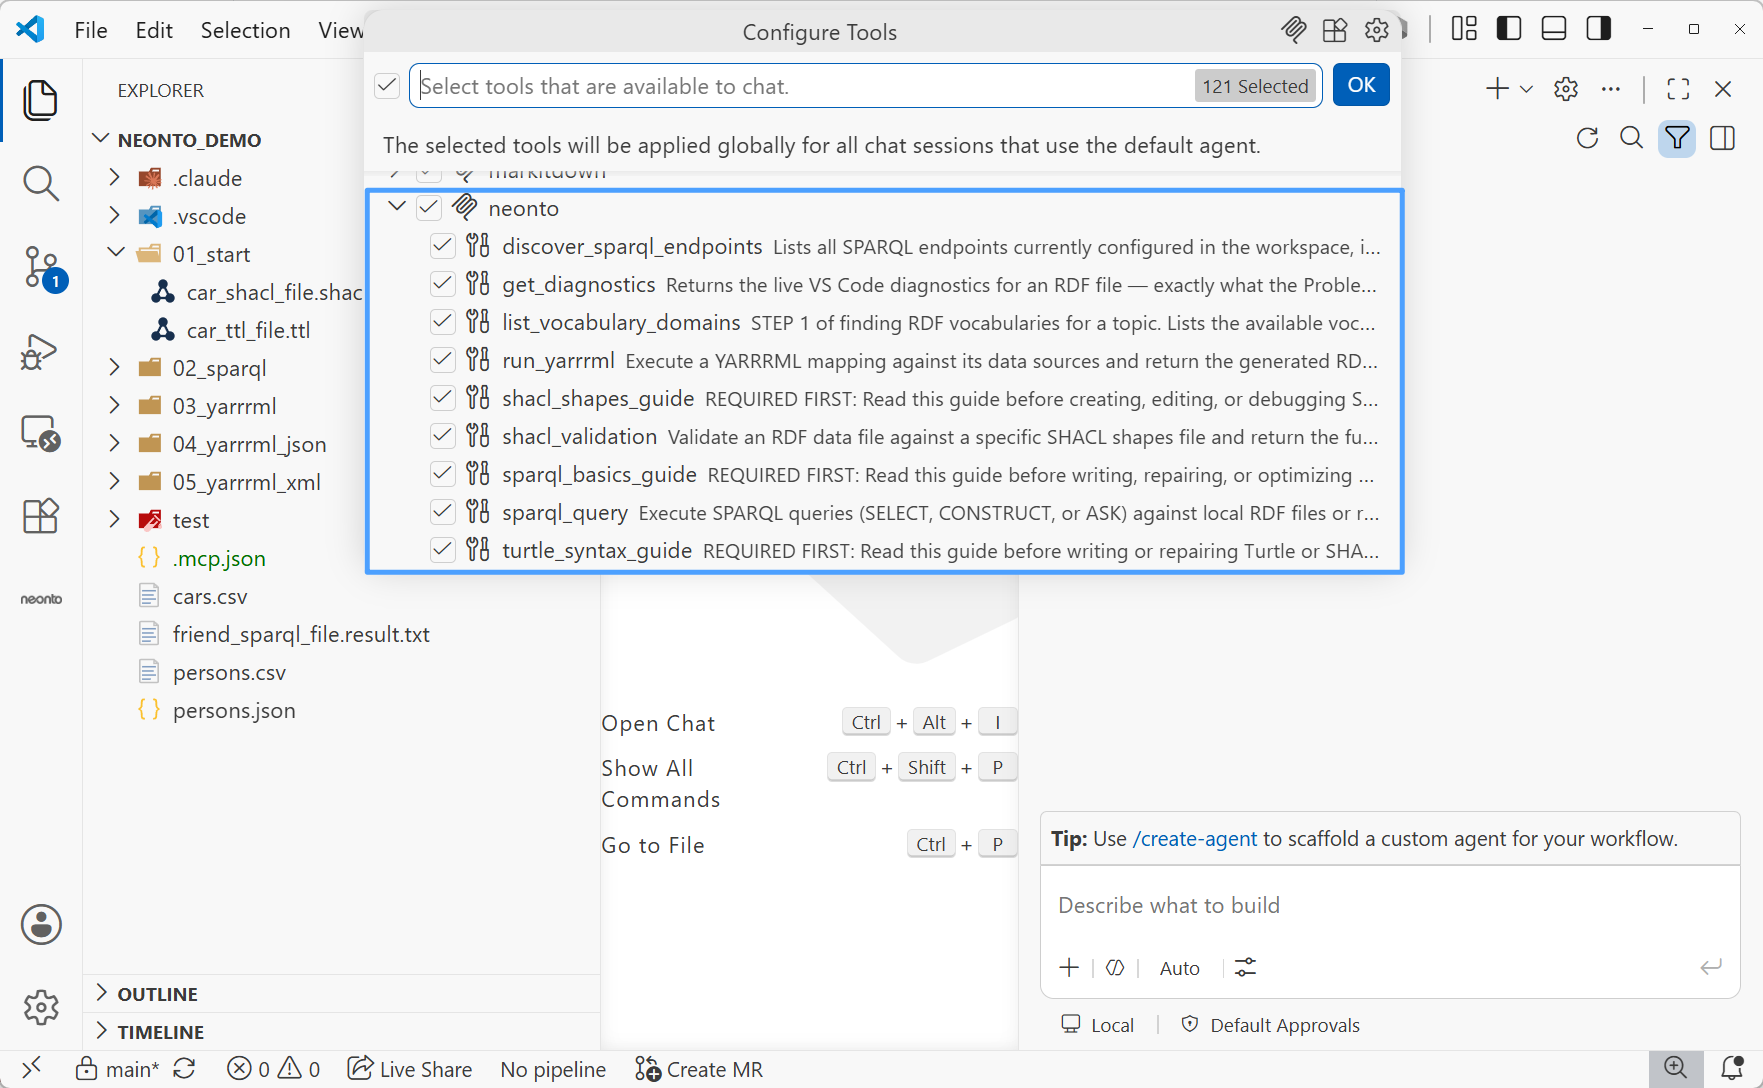
Copilot Chat discovers the neonto MCP server automatically. No configuration is required: once the extension activates and you are authenticated, neonto's tools appear alongside Copilot Chat's other available tools.
GitHub Copilot CLI
Either run copilot mcp add interactively (choose HTTP as the server type), or add the entry to ~/.copilot/mcp-config.json — the format is identical to the generated .mcp.json shown above.
Copilot CLI can also discover the running server through the temporary URL file neonto writes on activation. Manage and verify servers with the /mcp command in an interactive session.
Claude Code
Claude Code reads a project-root .mcp.json natively — so running neonto: Set Up AI Agent and choosing Claude is the entire setup (it also drops a CLAUDE.md so Claude Code knows how to use neonto's tools). Approve the server when Claude Code prompts on next start.
Alternatively, register the server from the terminal:
claude mcp add --transport http neonto http://127.0.0.1:6789/mcp
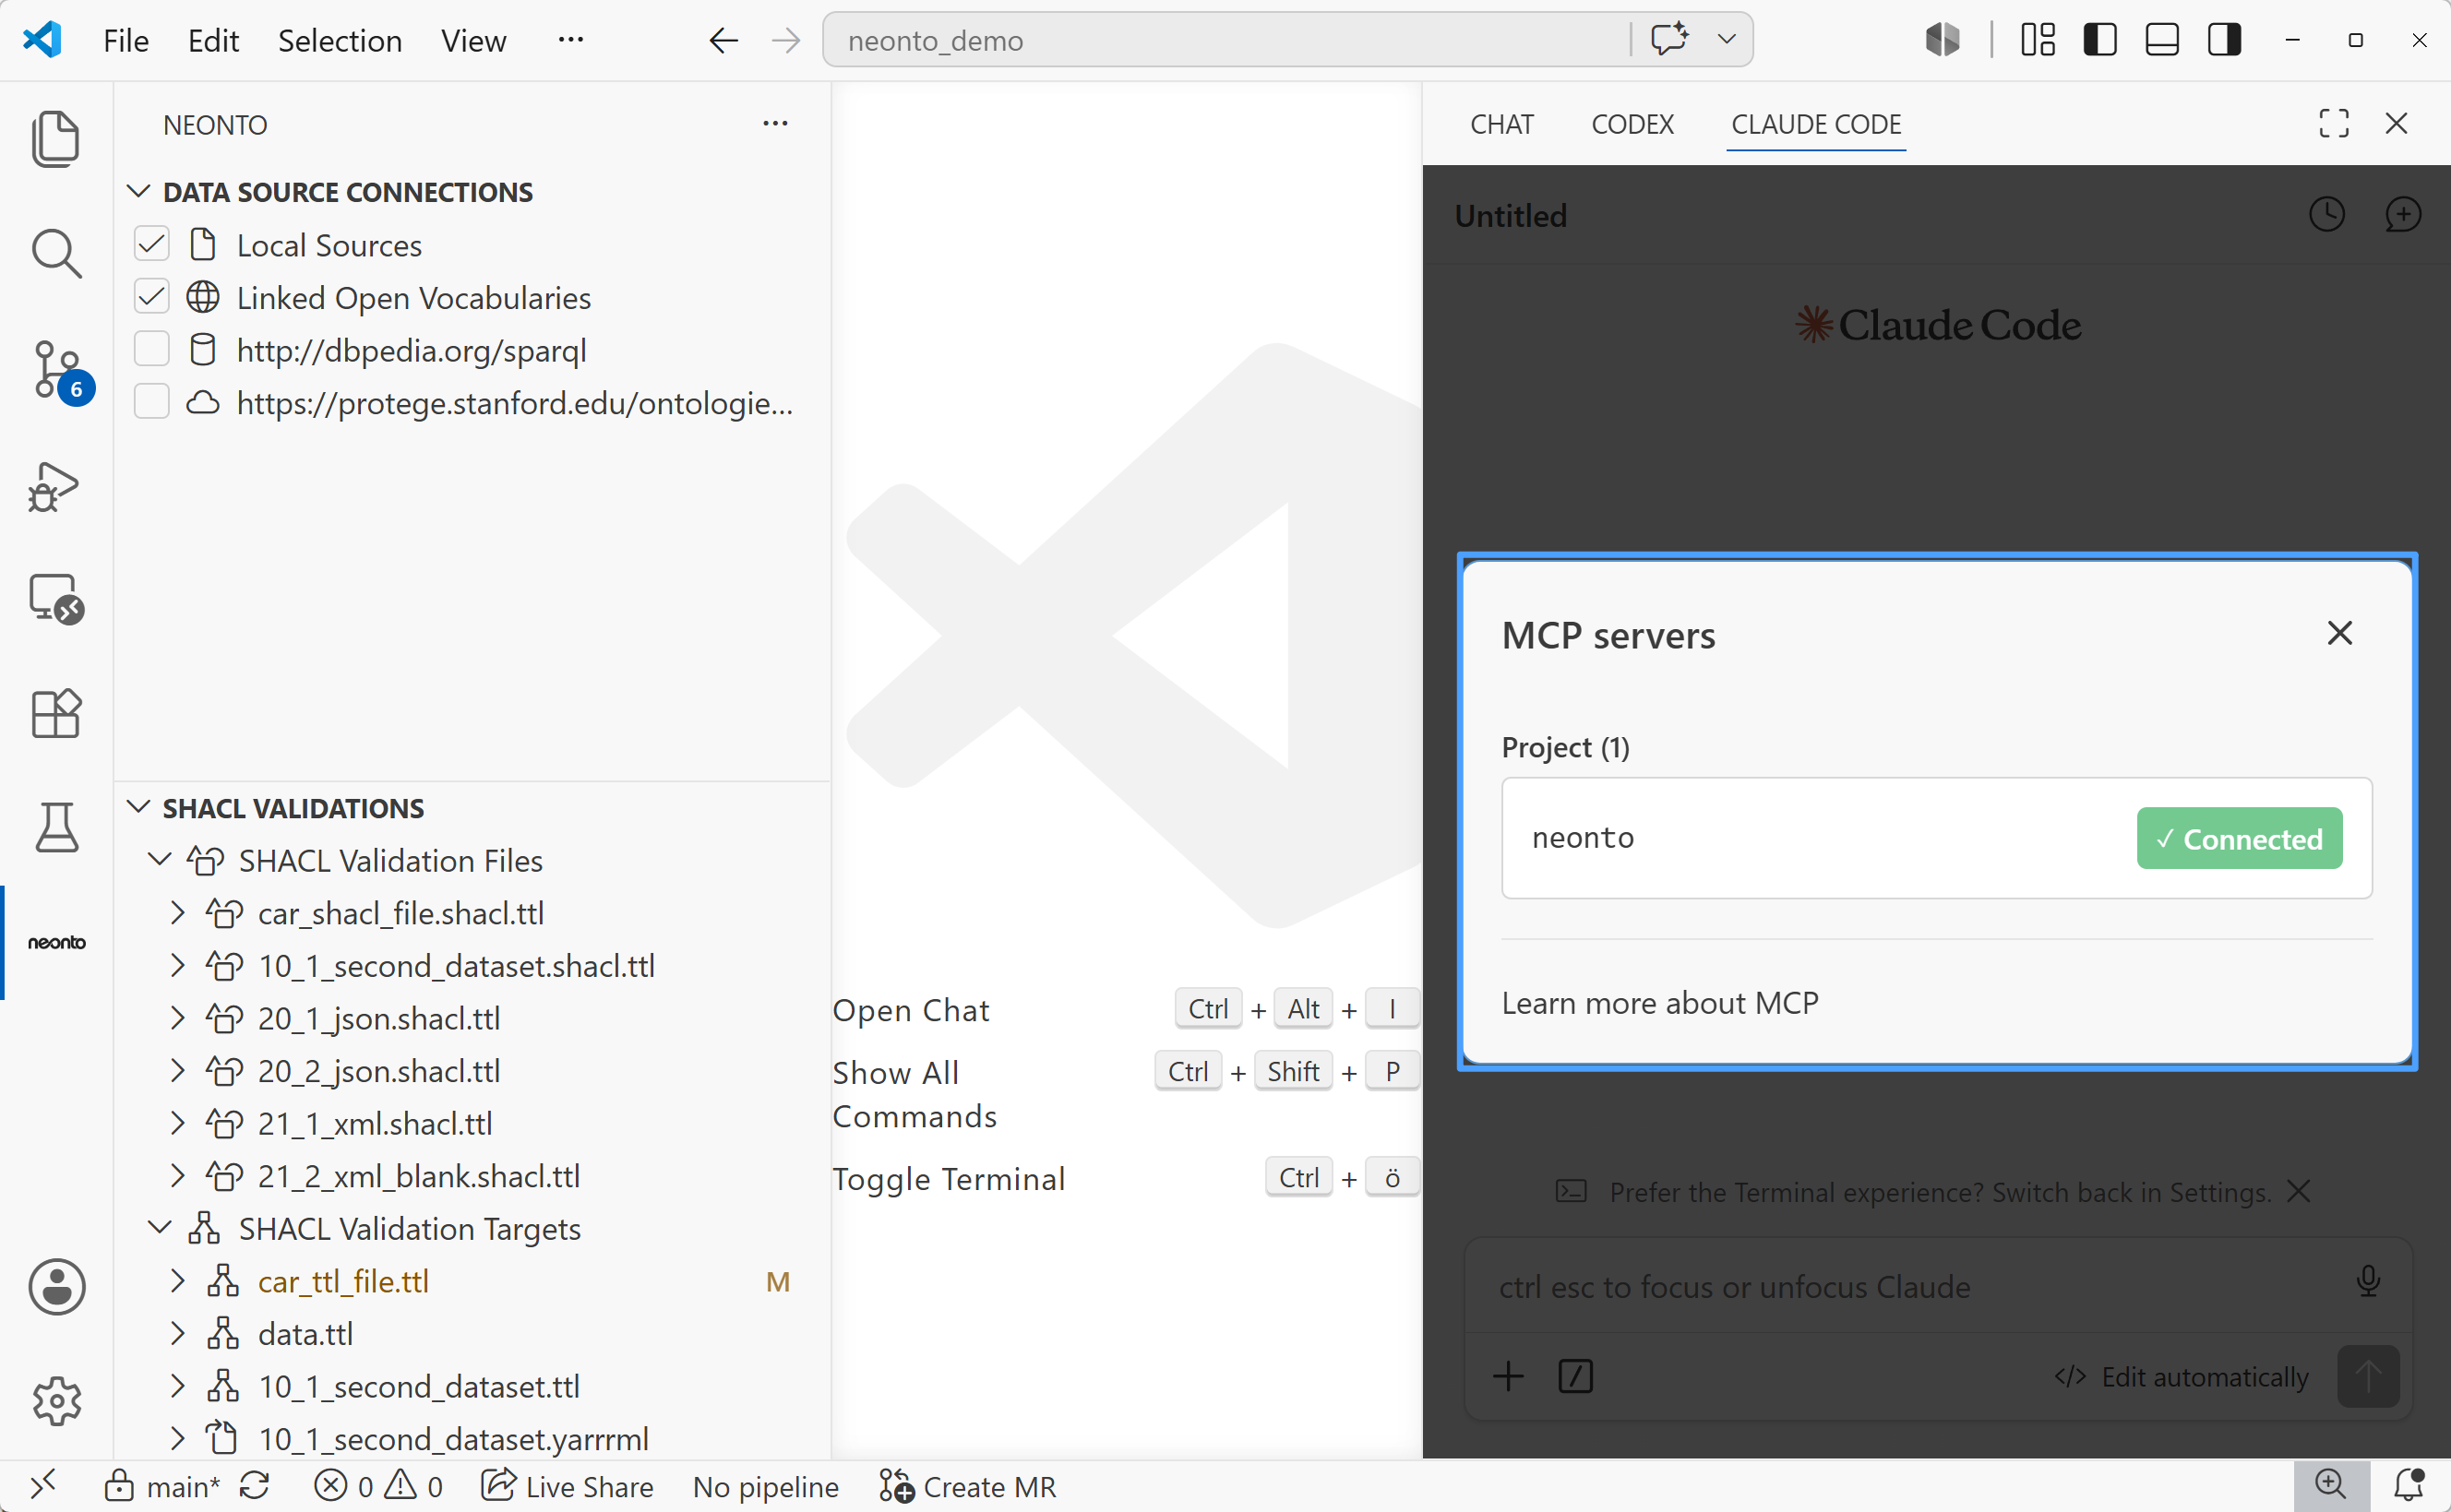
Verify the connection with /mcp in the Claude Code terminal, or — in the Claude Code VS Code extension — via the MCP servers panel: the neonto server should be listed as connected.
Codex
Codex extension in VS Code (step by step)
The Codex VS Code extension is configured through its own settings UI — no config file needed.
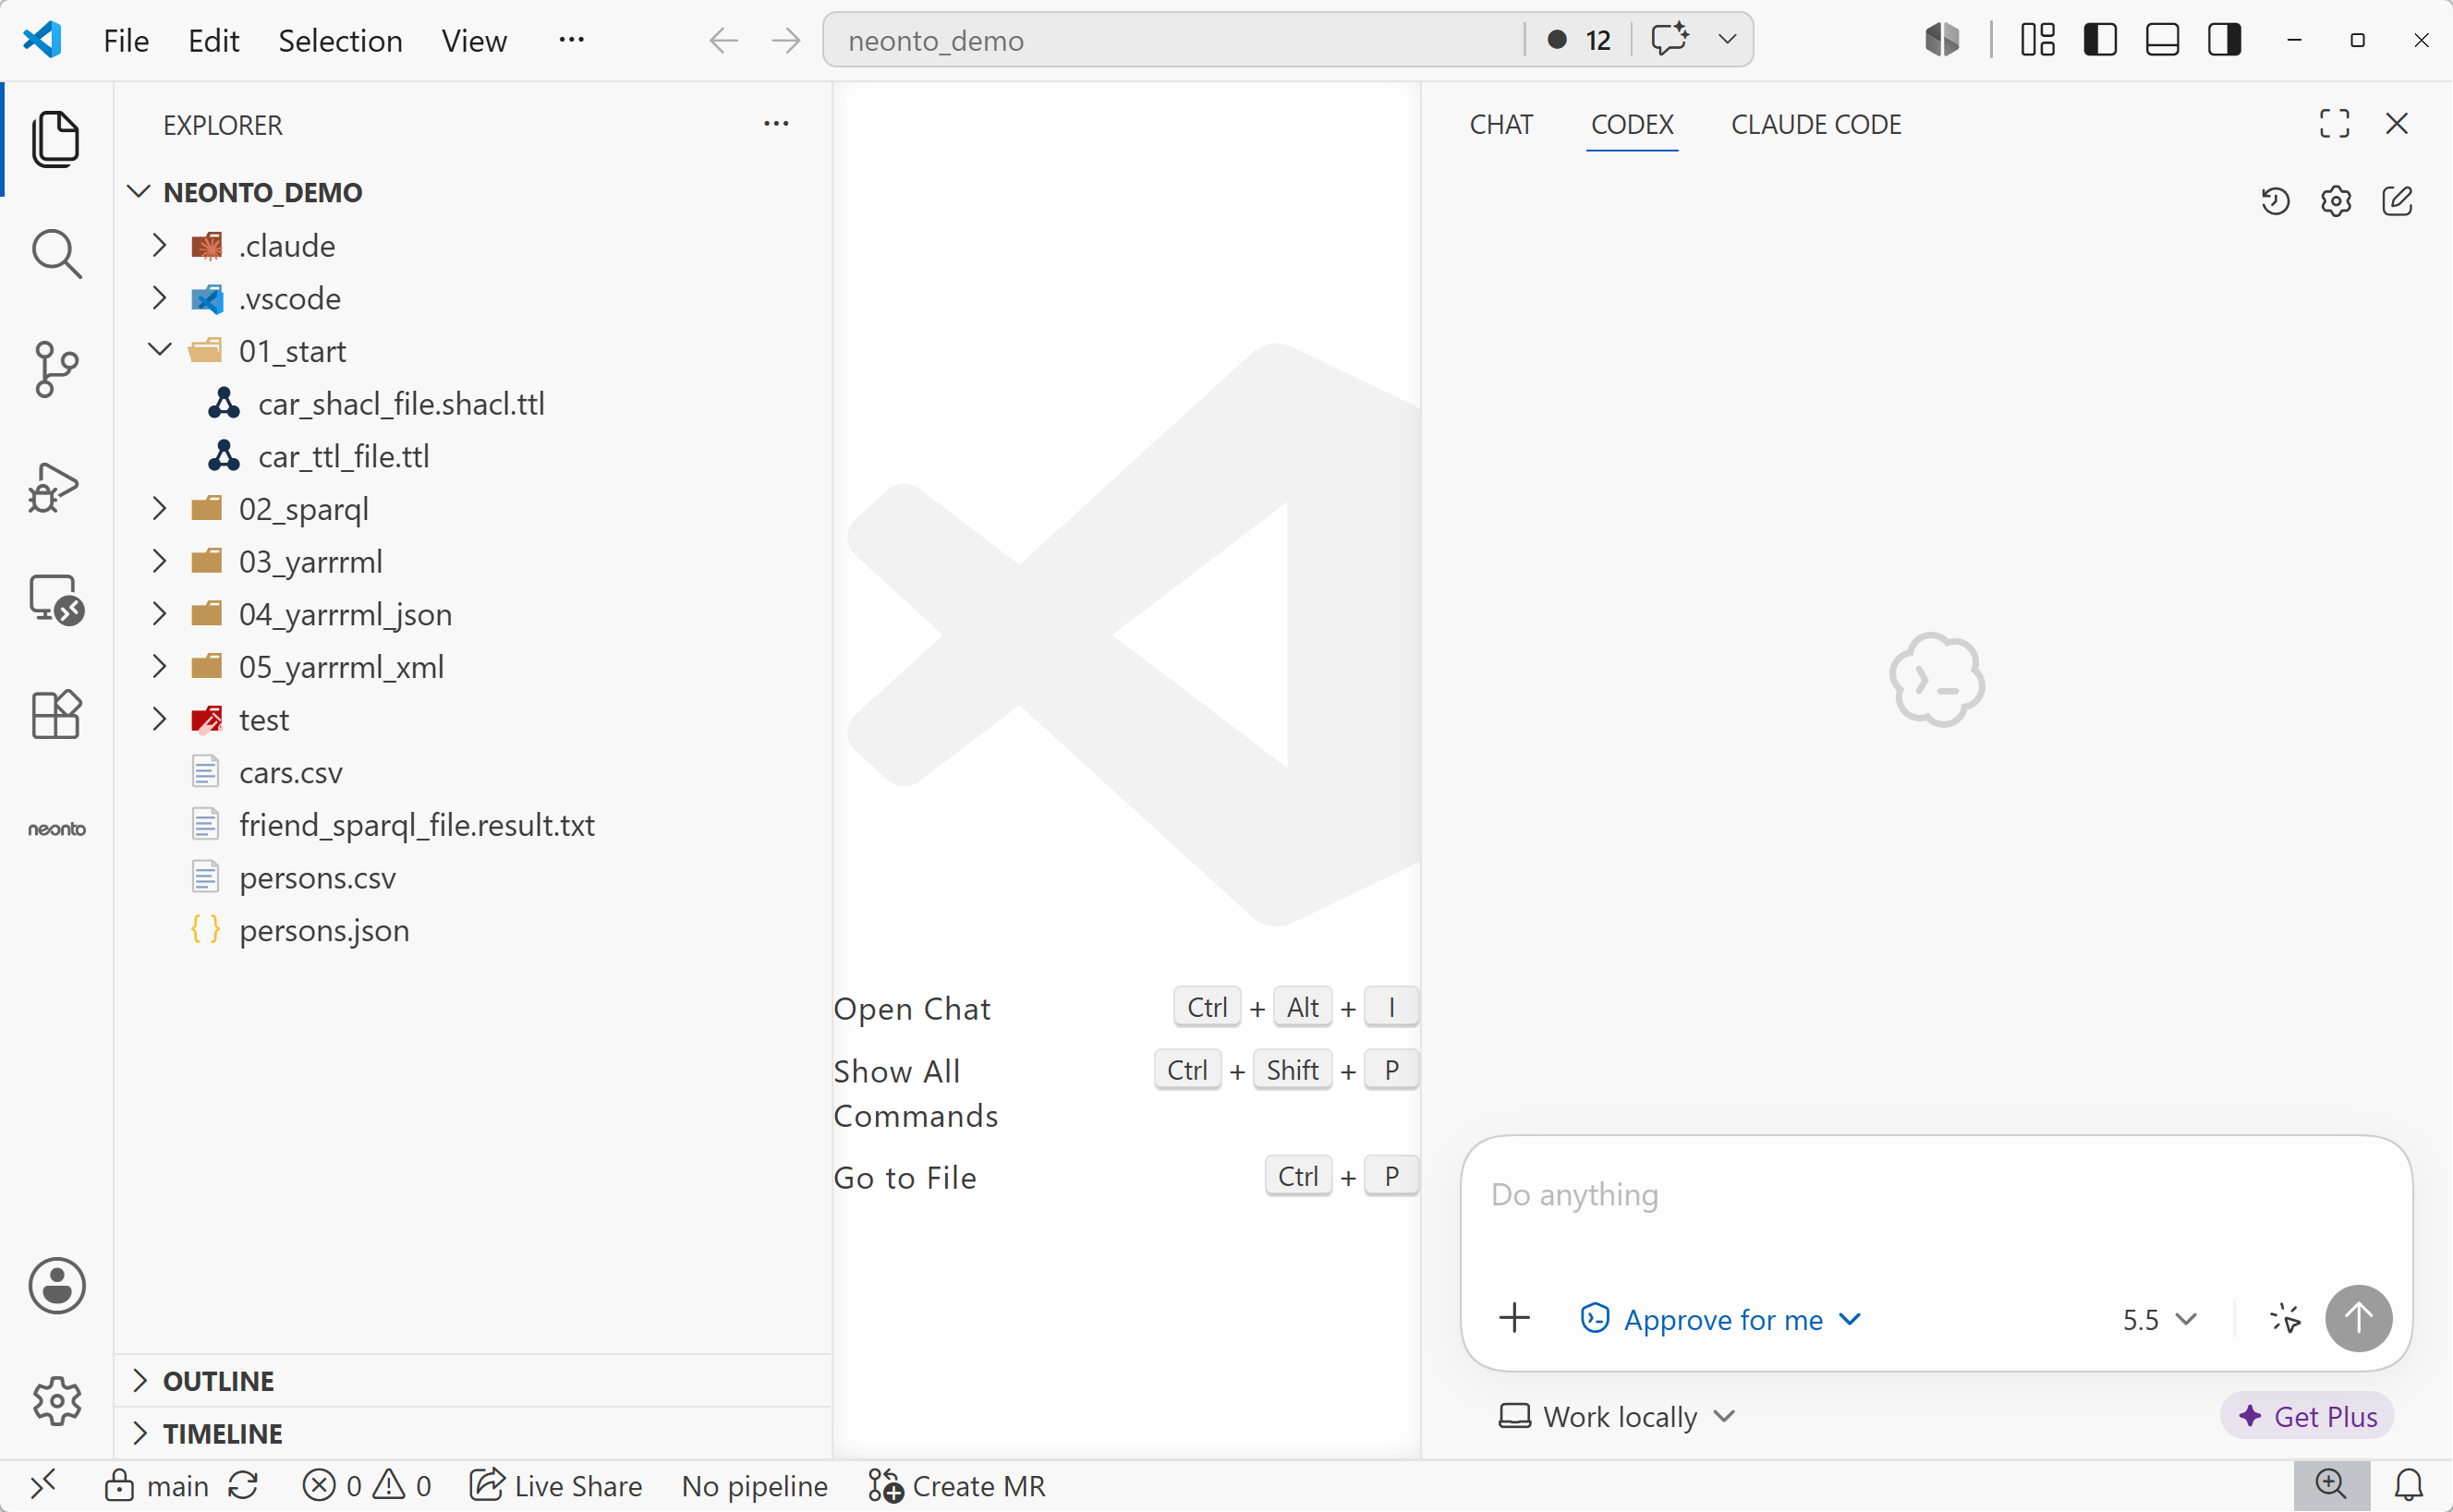
Step 1 — Open the Codex panel in VS Code (the CODEX tab).
Step 2 — Copy the server URL to your clipboard.
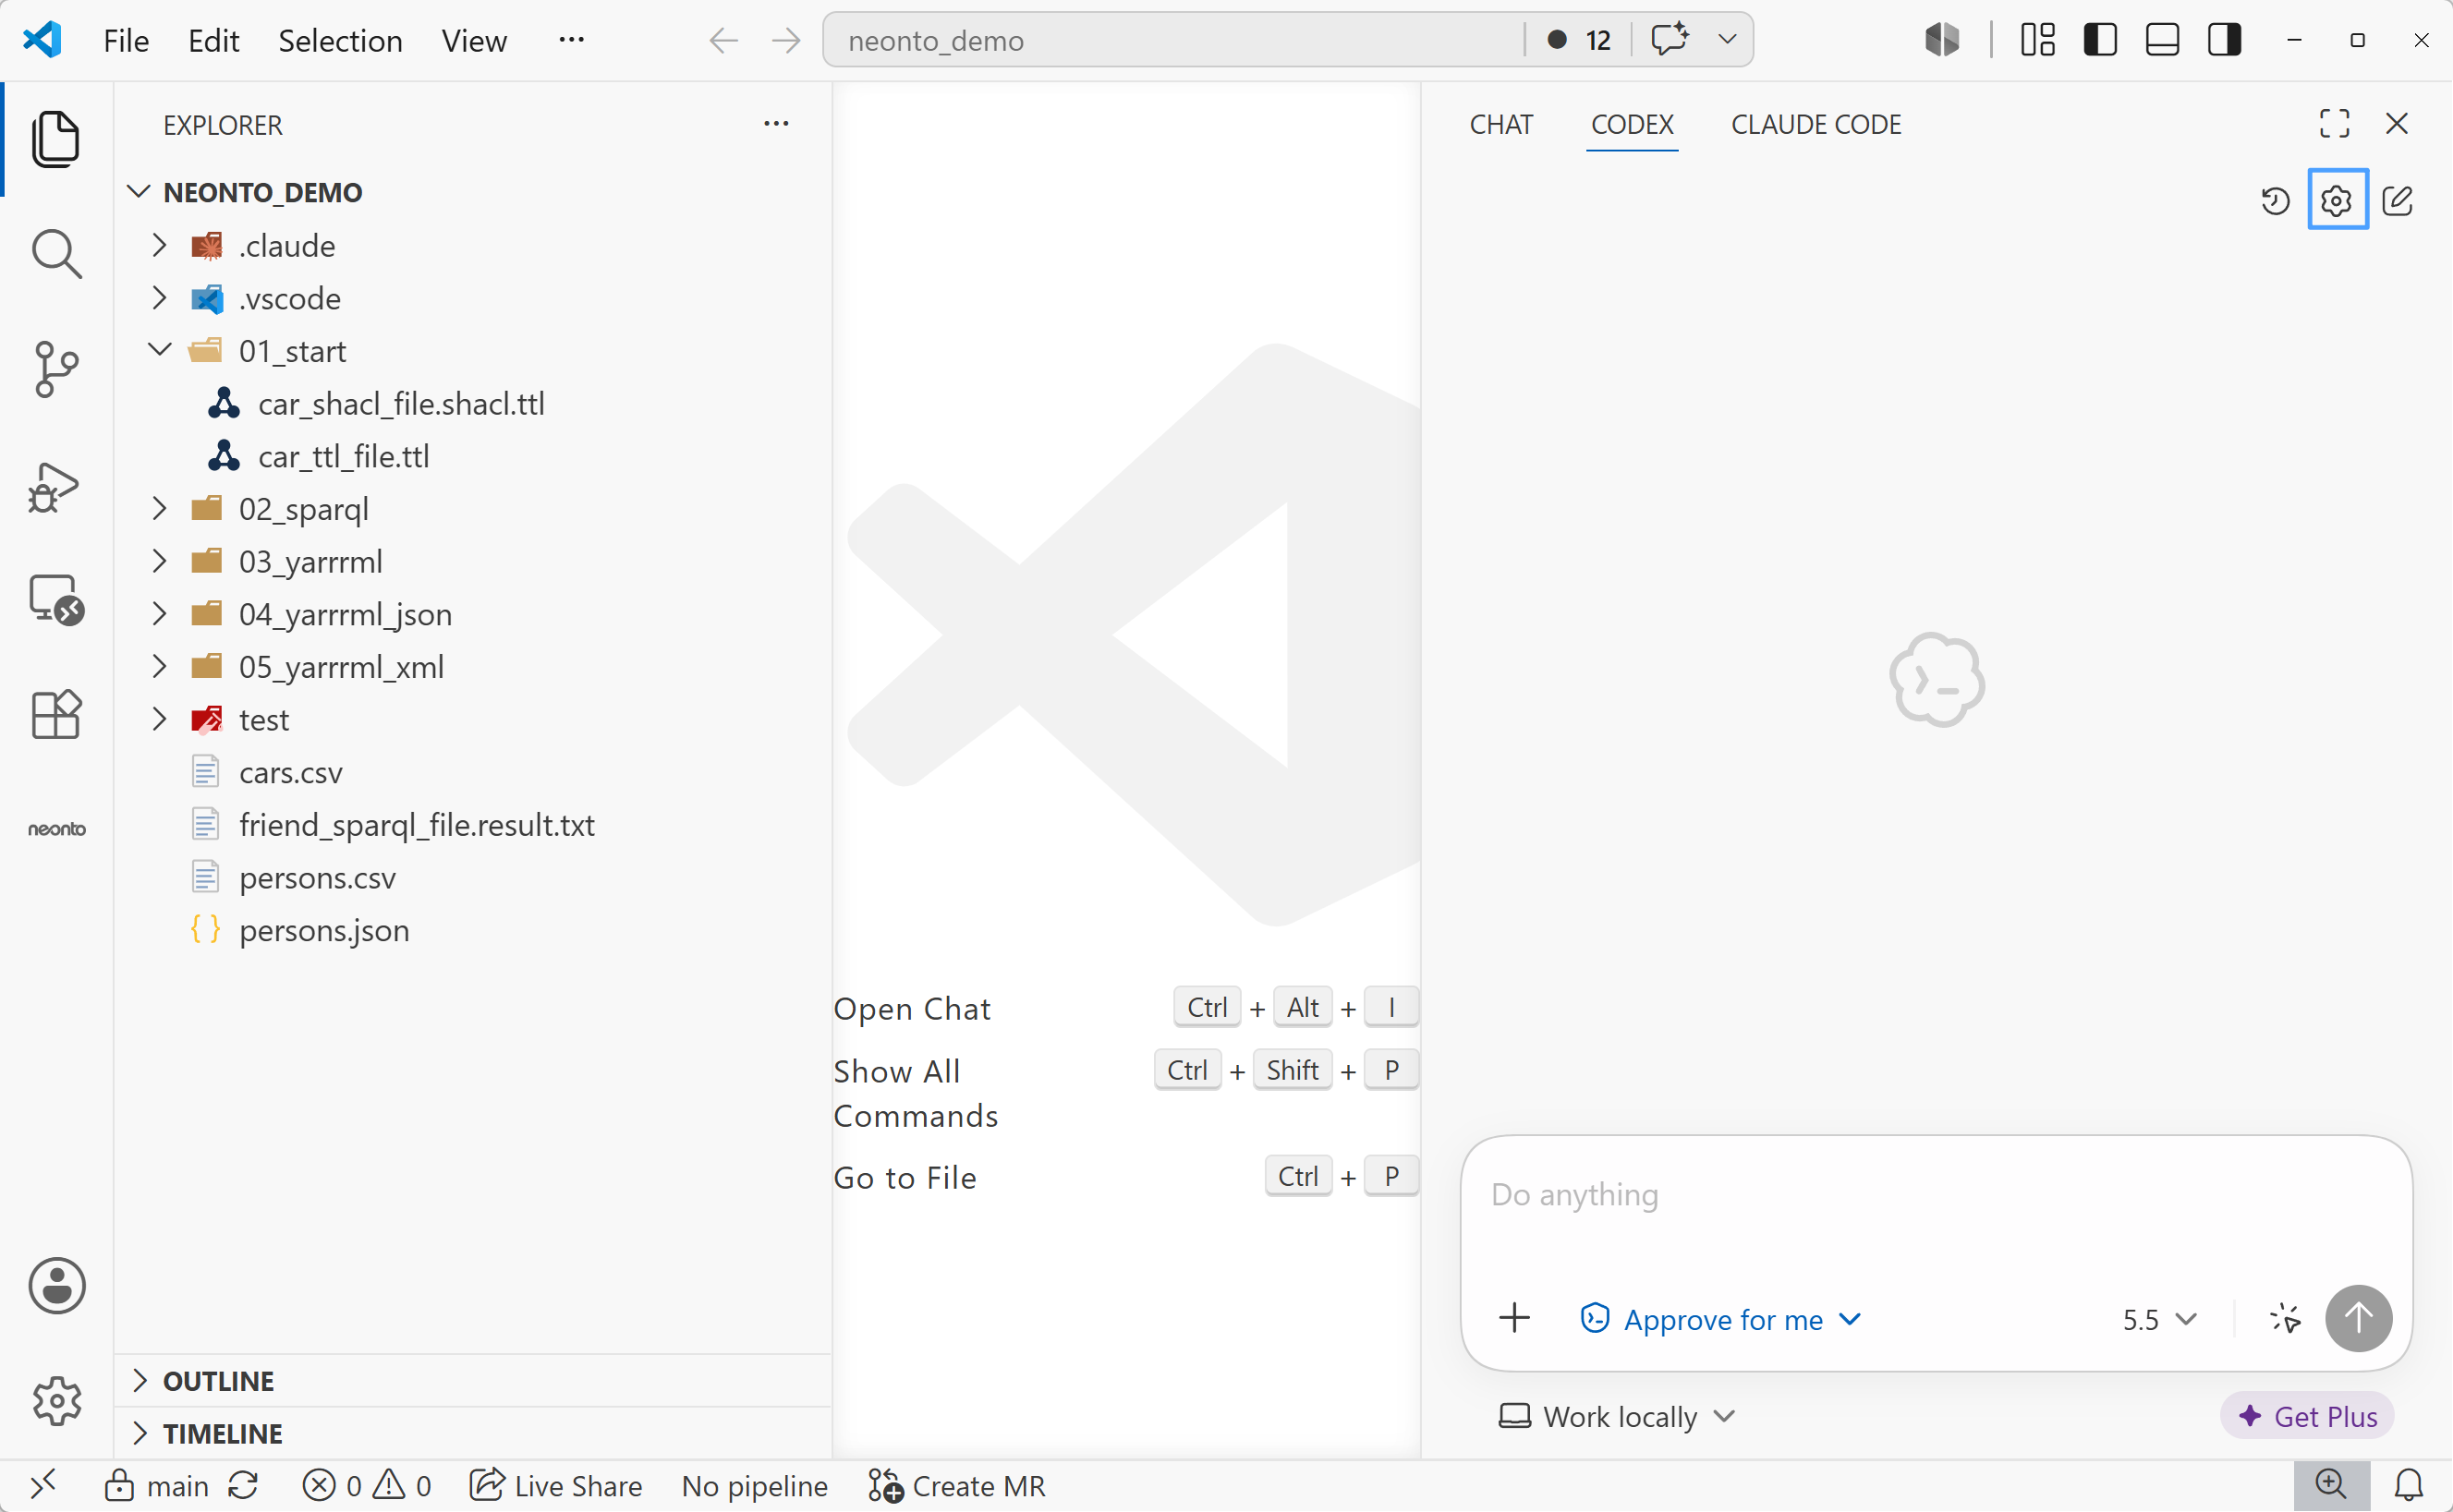
Step 3 — In the Codex panel, open the settings (gear icon).
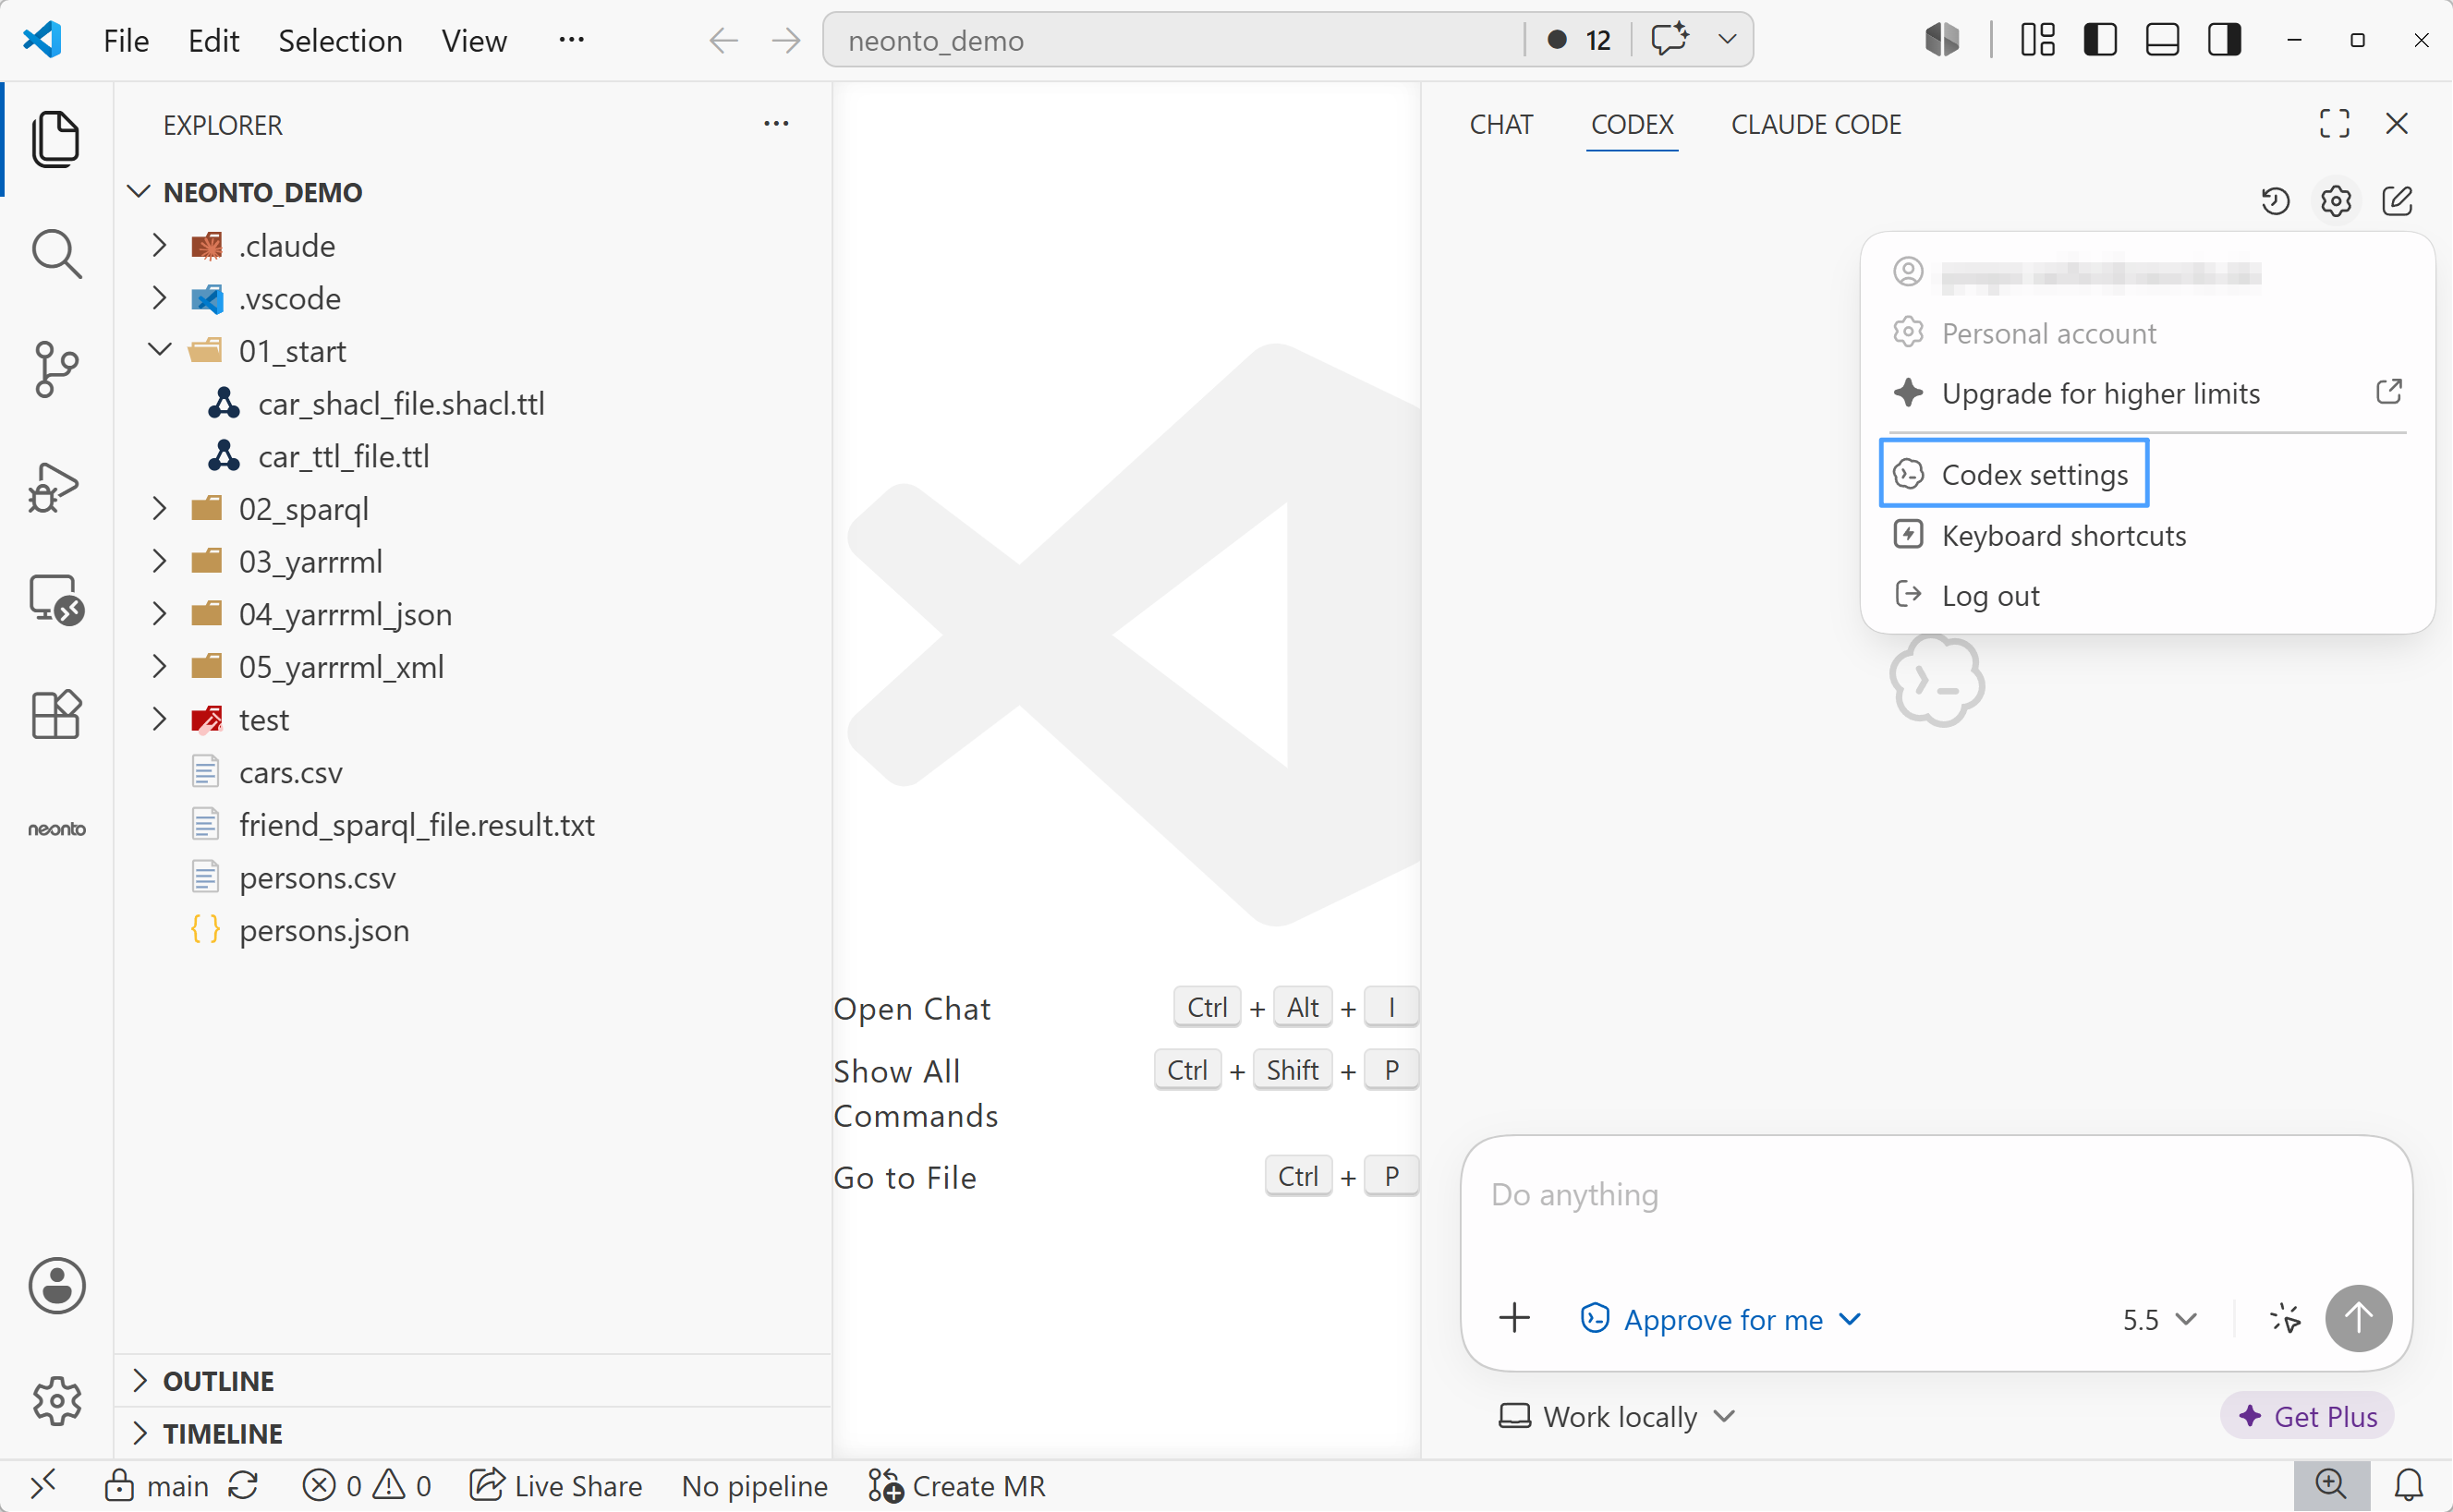
Step 4 — Choose Codex settings from the account menu.
Step 5 — In the Codex Settings tab, select MCP servers.
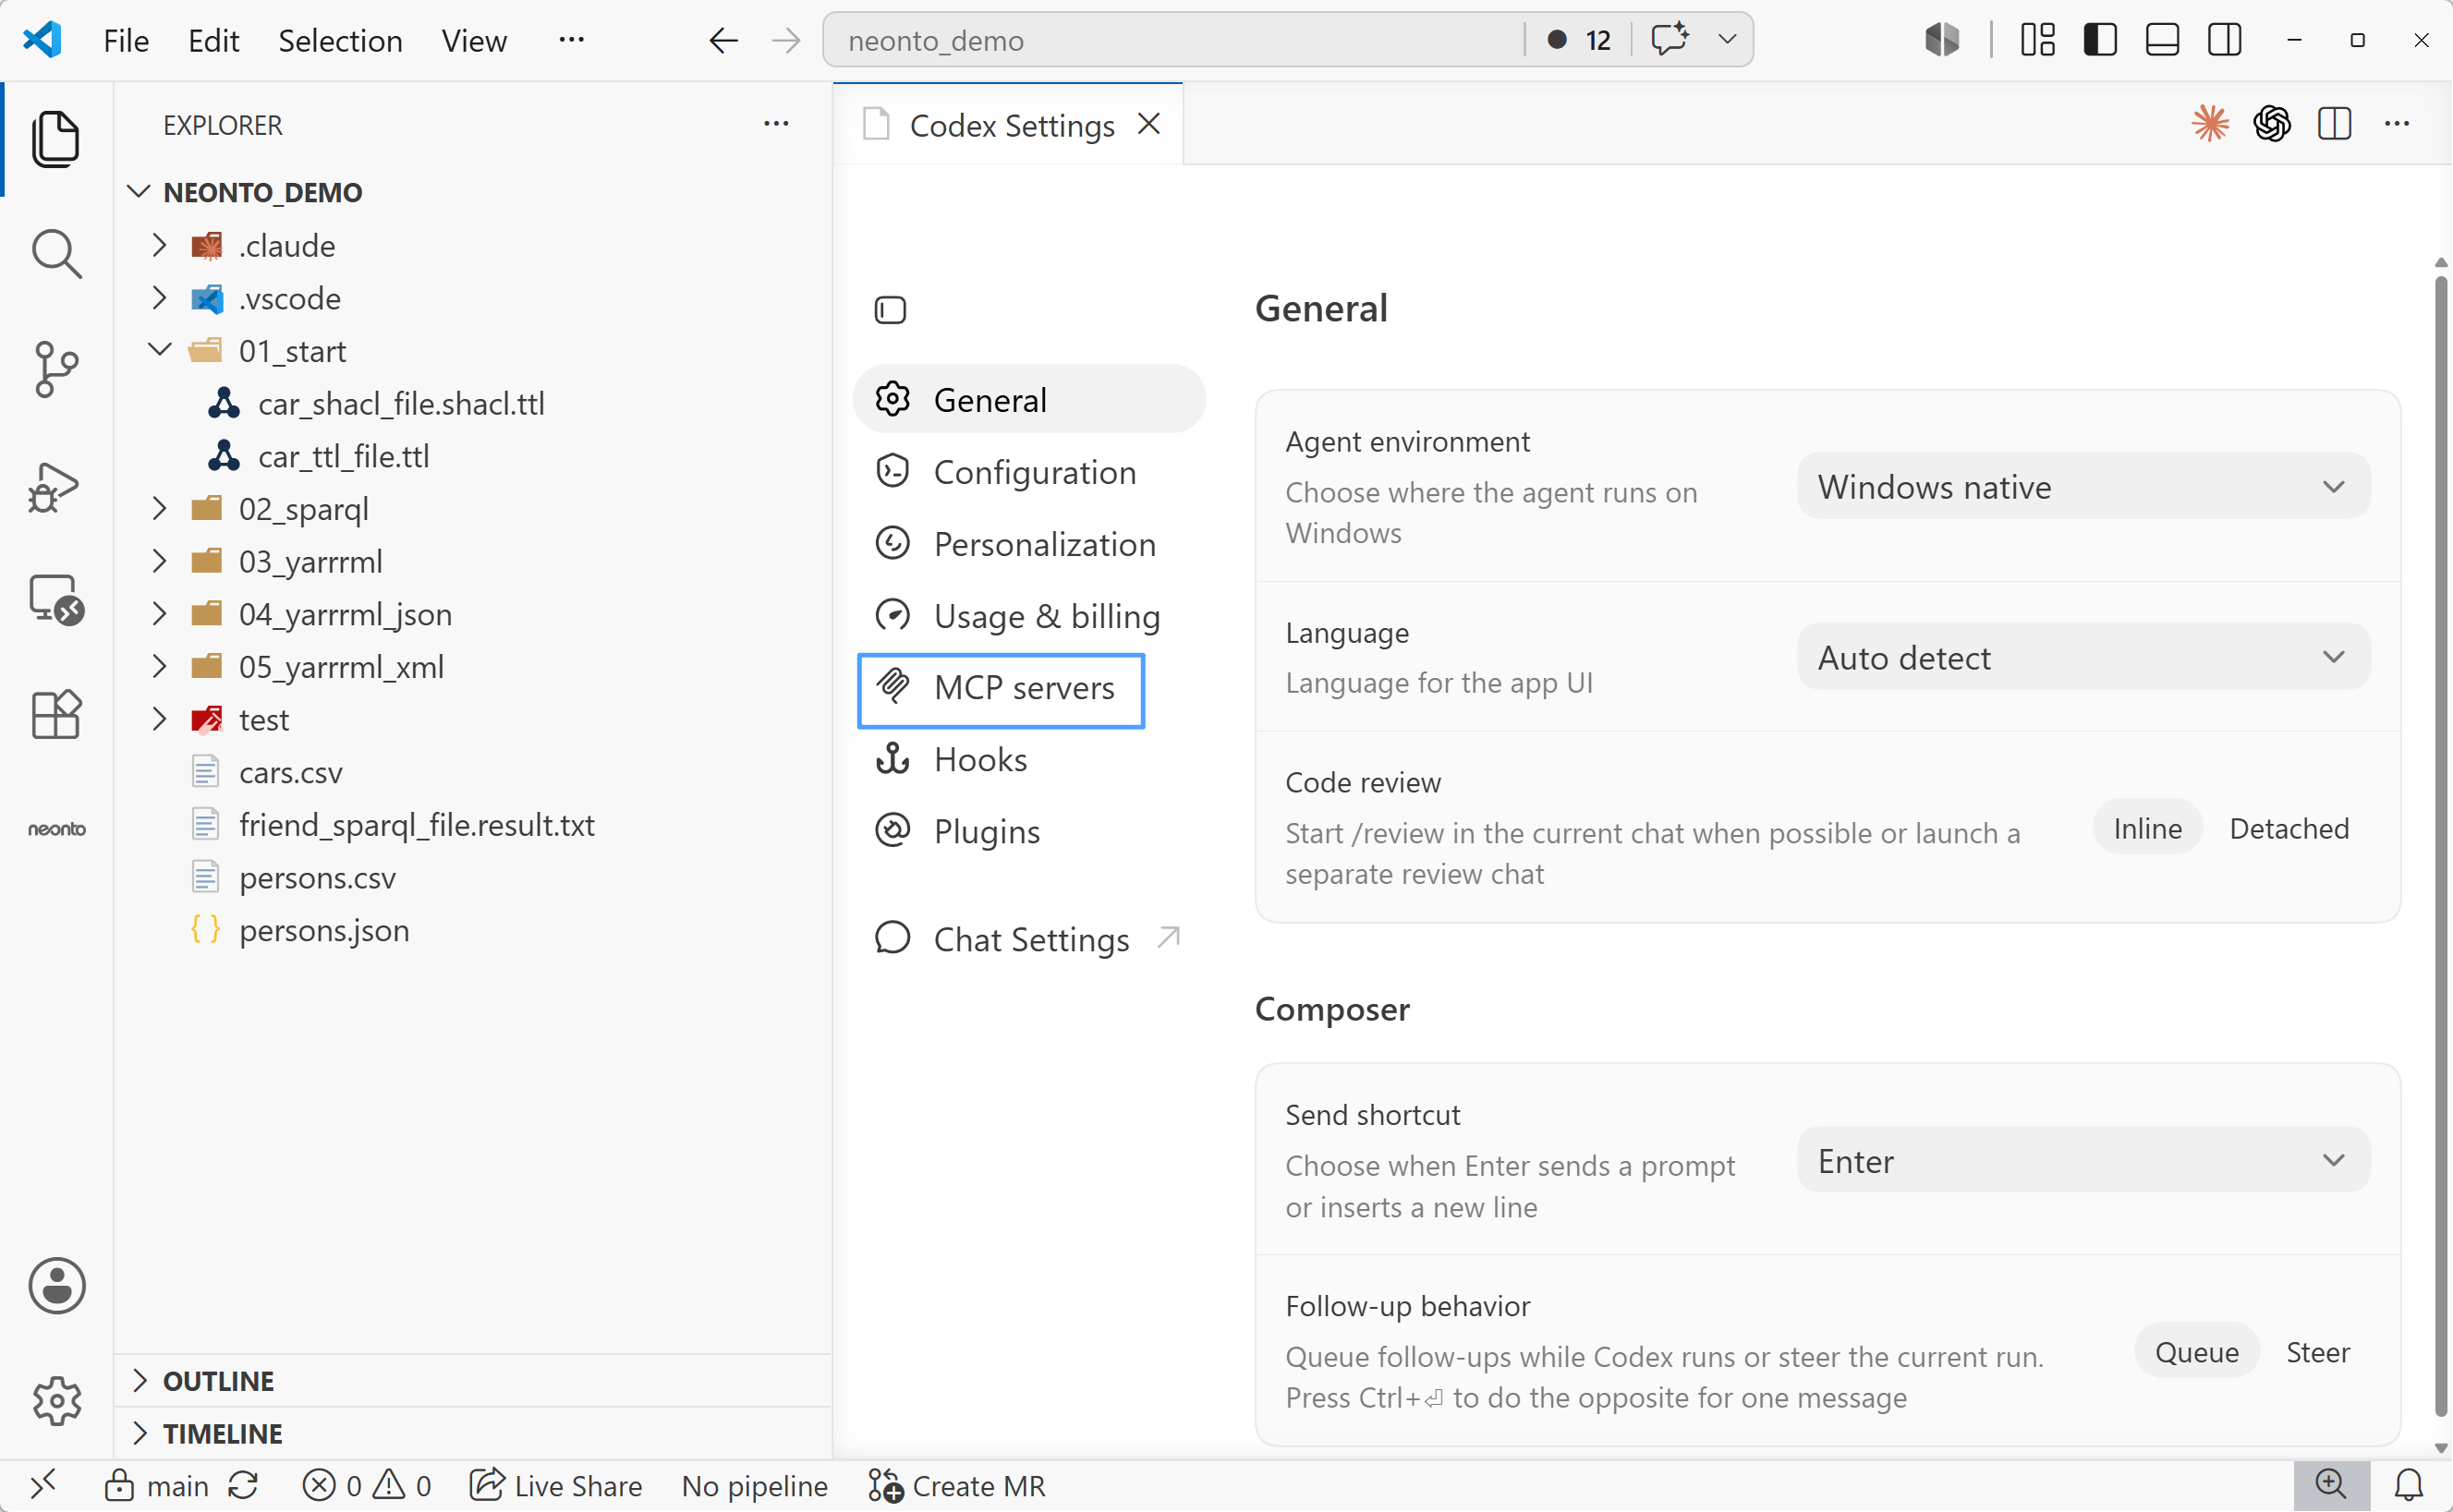
Step 6 — Click Add server.
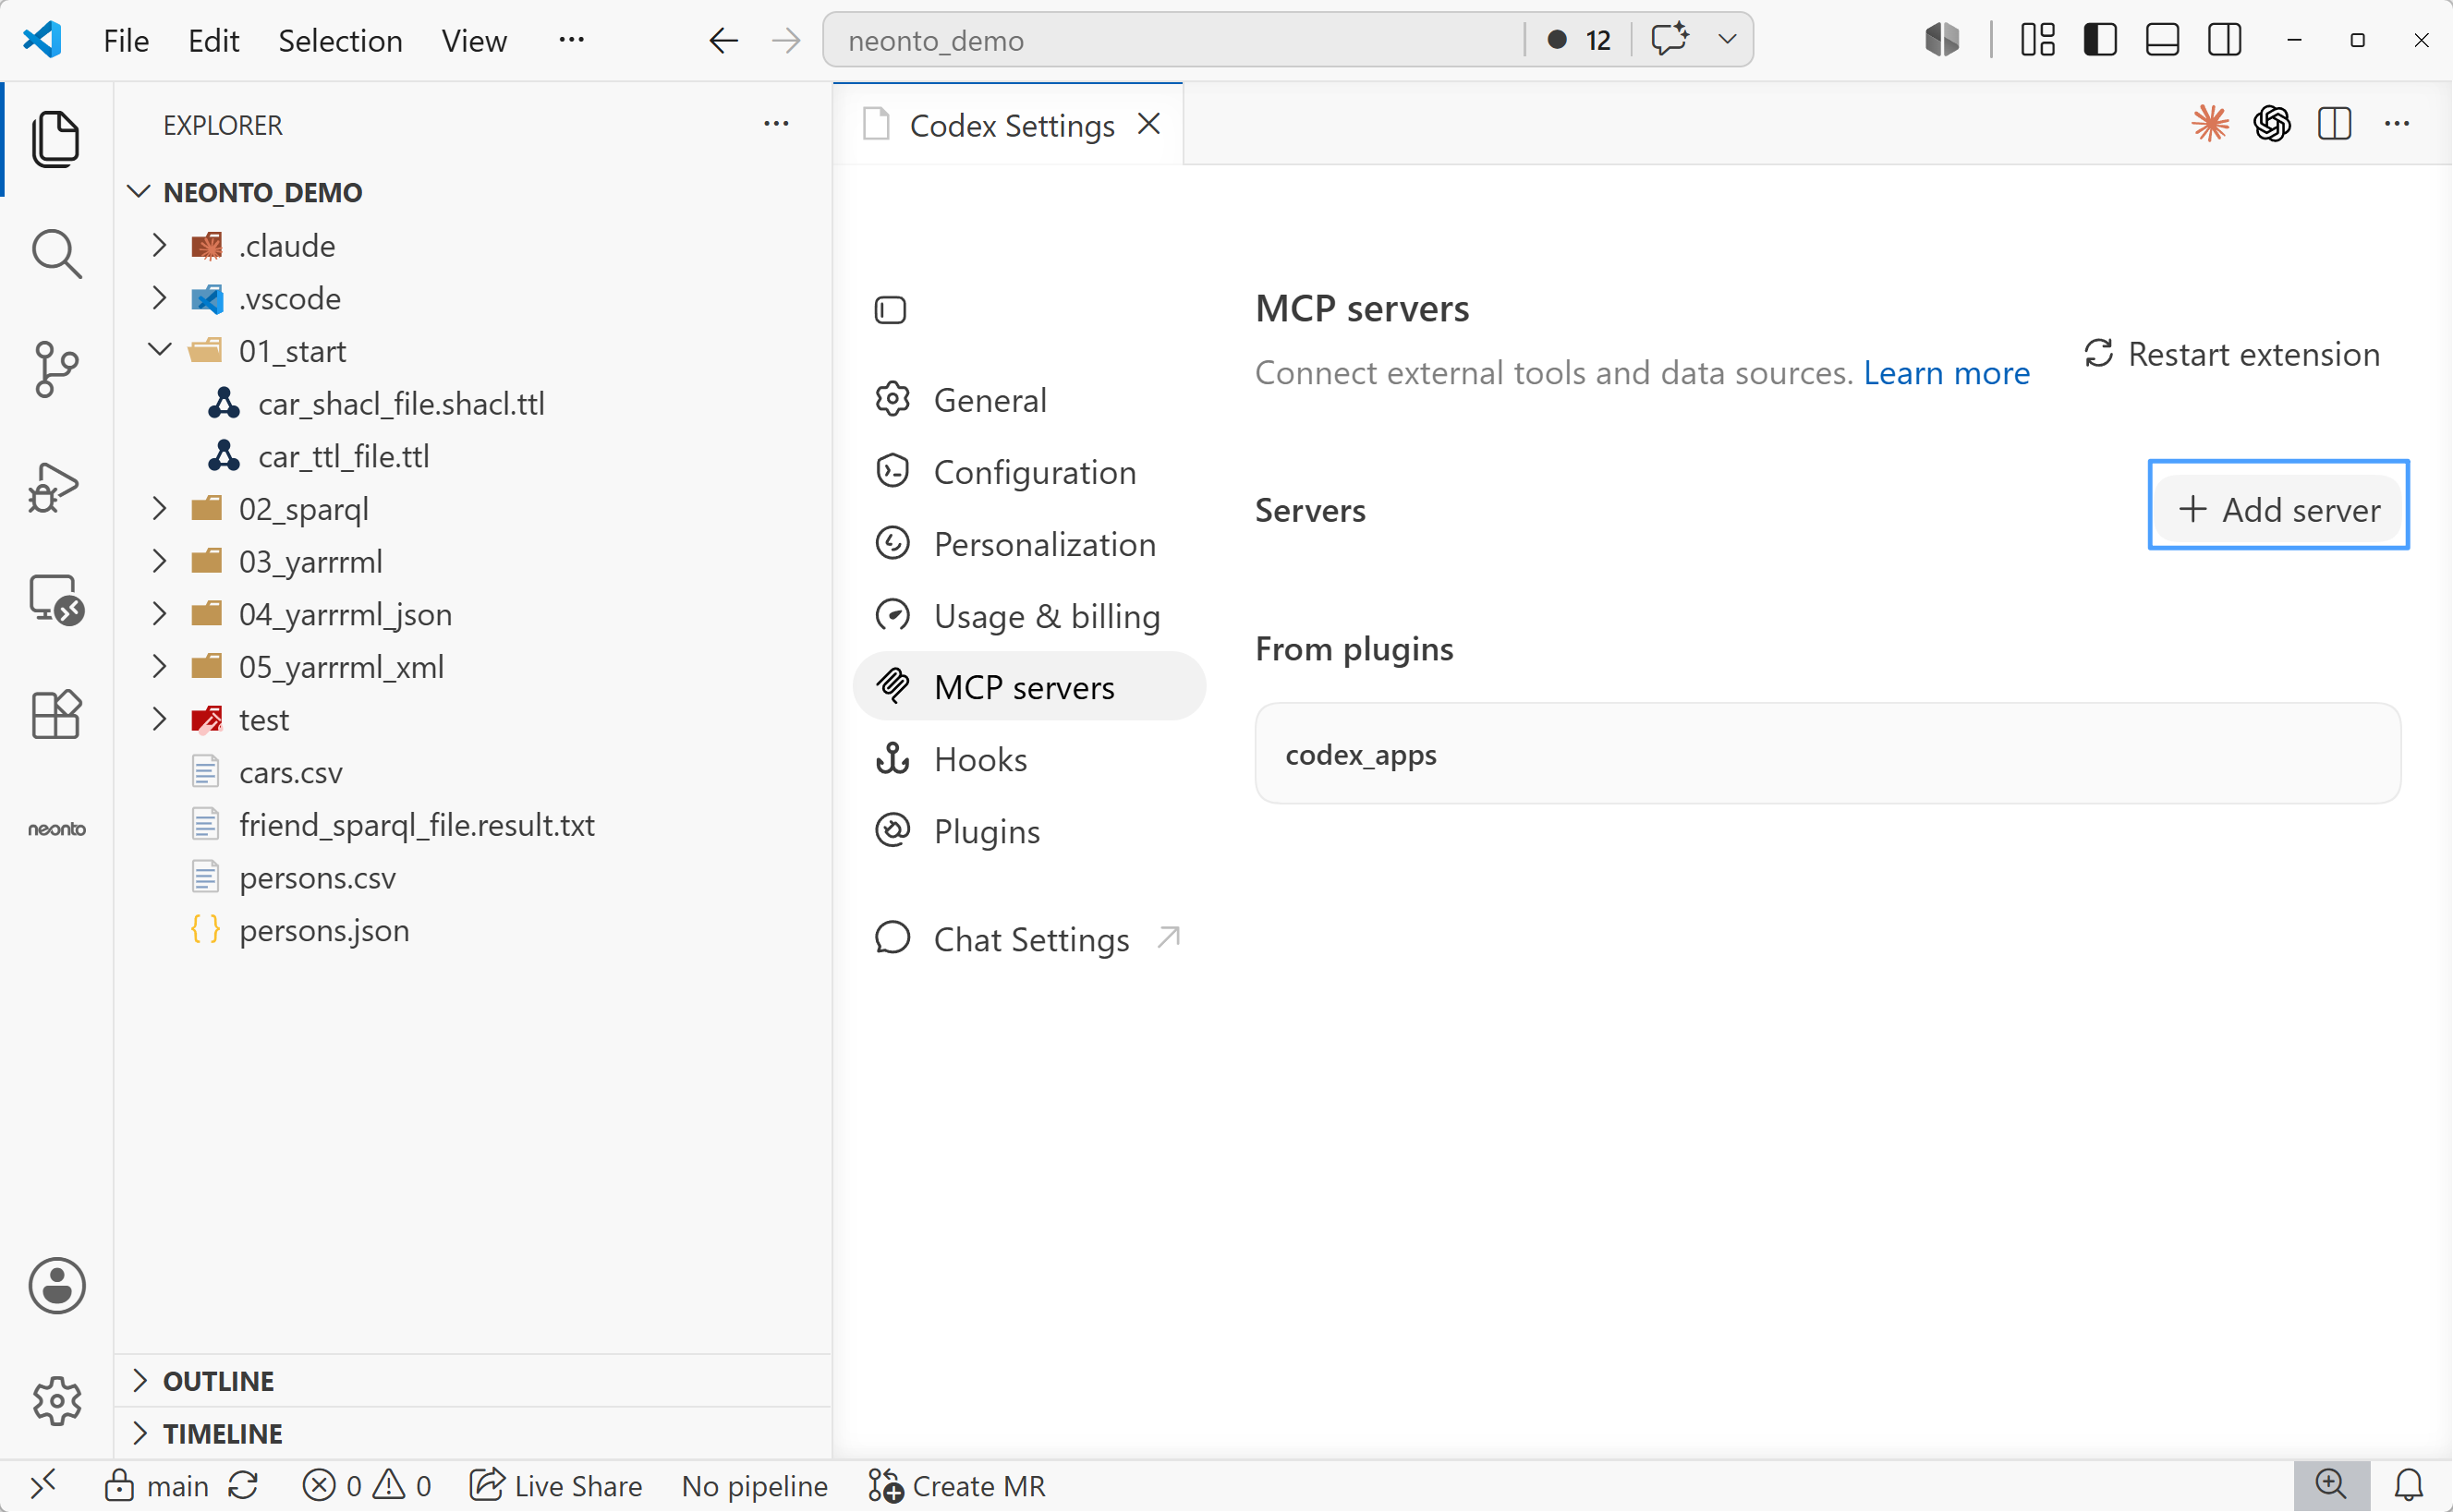
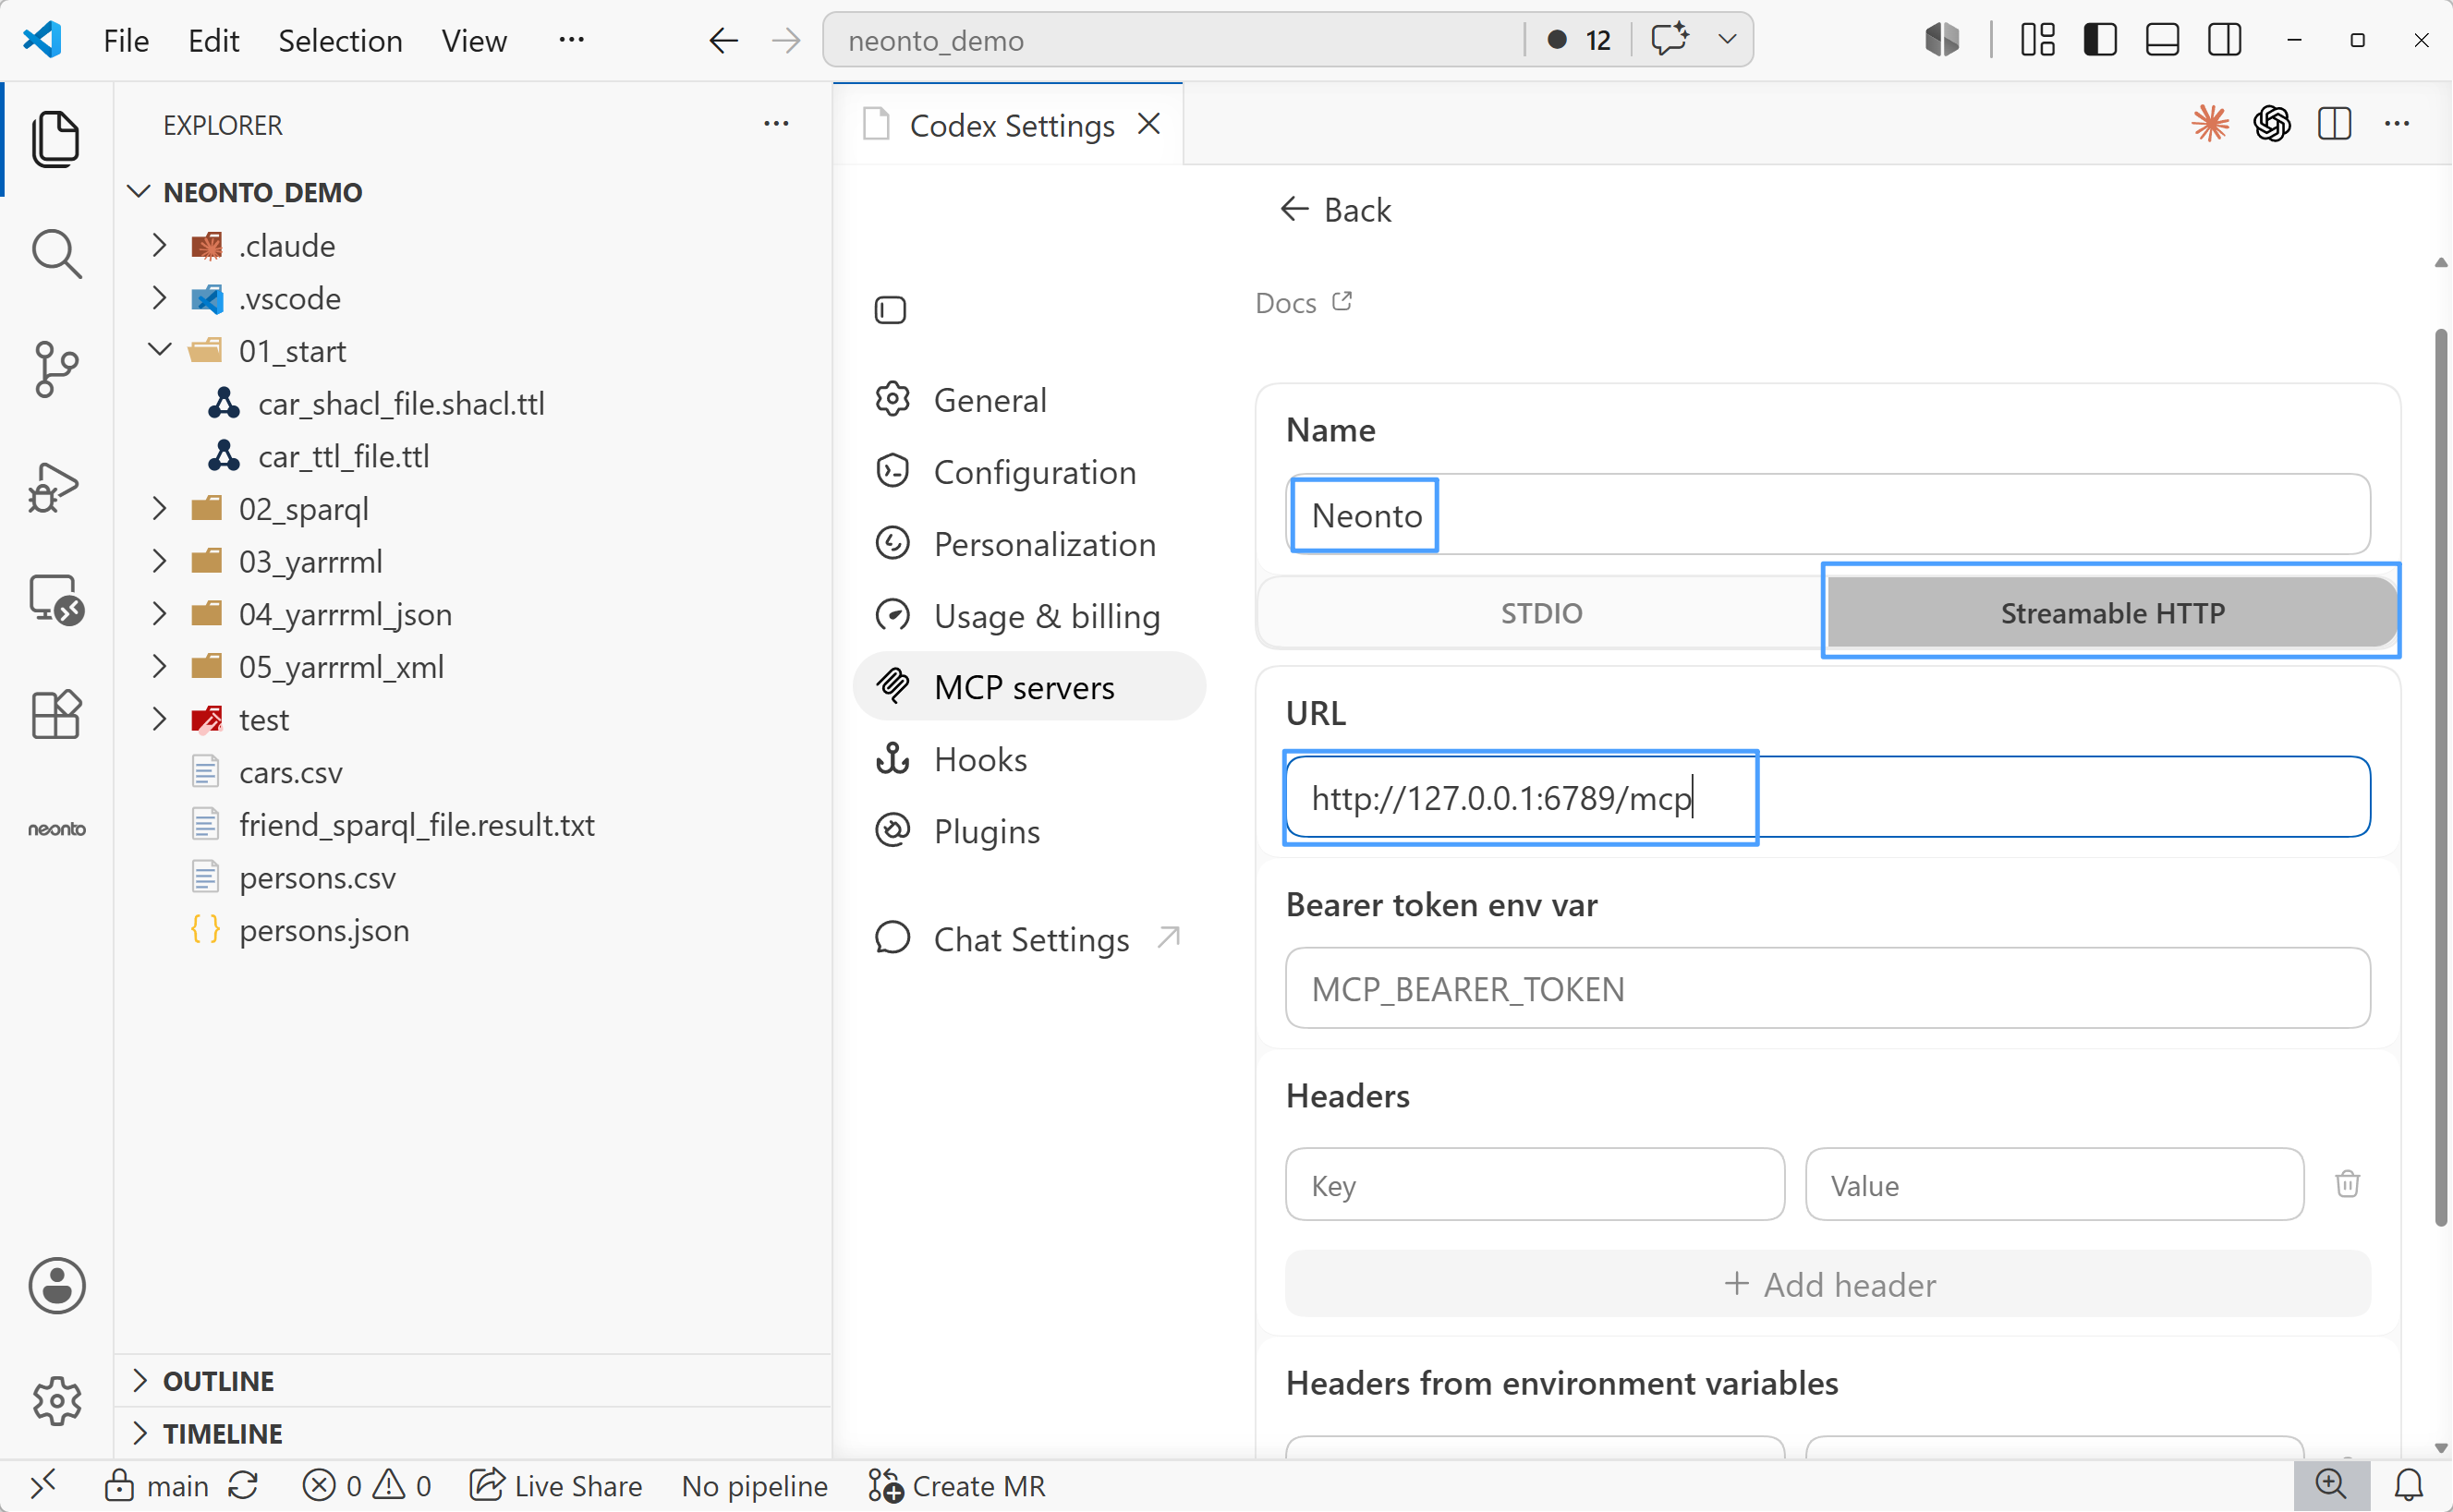
Step 7 — Name the server Neonto, select Streamable HTTP, and paste the copied URL.
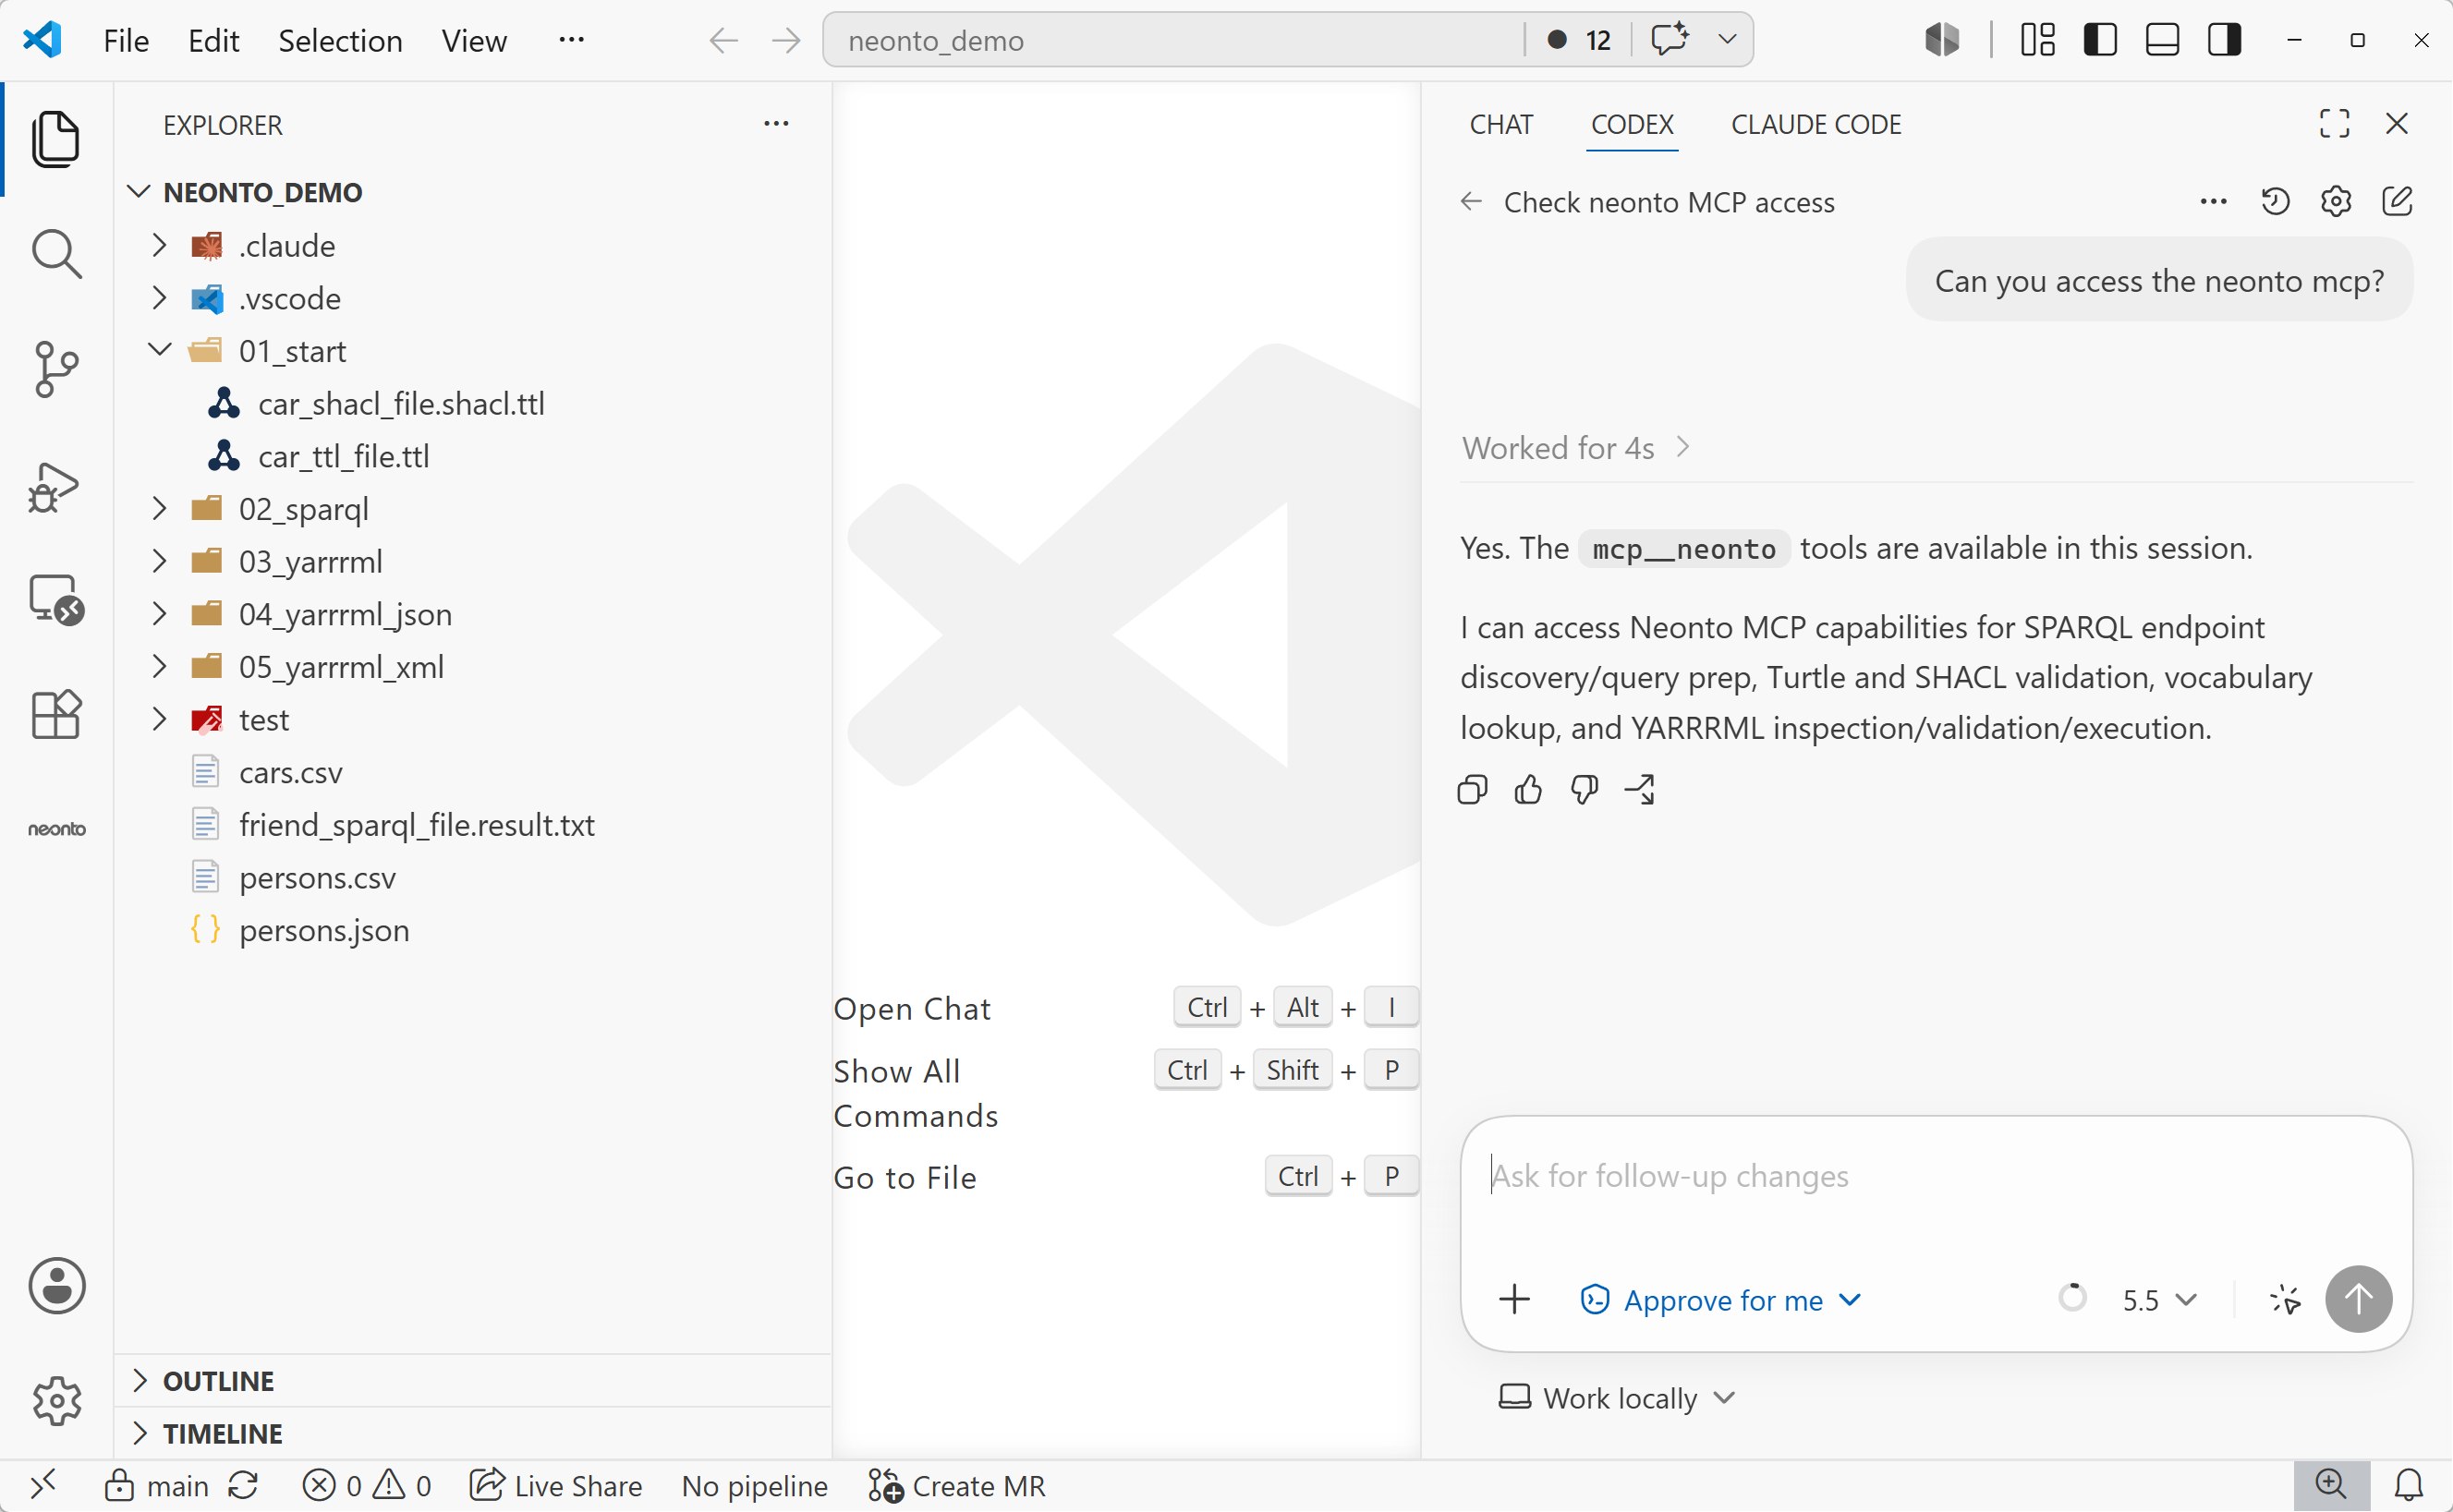
Step 8 — Verify: ask Codex "Can you access the neonto MCP?". Codex should confirm that the mcp__neonto tools are available.
Antigravity
Open Settings → Customizations → "Open MCP Config" to edit mcp_config.json (global: ~/.gemini/config/mcp_config.json; per project: .agents/mcp_config.json). Note that Antigravity uses serverUrl — not url — for remote servers:
{
    "mcpServers": {
        "neonto": {
            "serverUrl": "http://127.0.0.1:6789/mcp"
        }
    }
}
Reload the MCP configuration from the Customizations tab, then confirm the neonto tools are listed.
opencode
Add the server to opencode.json in your project root (type remote covers Streamable HTTP):
{
    "$schema": "https://opencode.ai/config.json",
    "mcp": {
        "neonto": {
            "type": "remote",
            "url": "http://127.0.0.1:6789/mcp",
            "enabled": true
        }
    }
}
Other MCP clients
Any MCP client that accepts a Streamable HTTP endpoint can connect with just the server URL: use the generated .mcp.json entry as a template, or paste the copied URL into the client's own configuration.